If you are over 50 and considering learning to surf, you might be concerned that you’re too late to the game.
The fact that you will struggle to master the necessary skills, that you will appear foolish, and that all of the other younger, fitter surfers would laugh at your inexperience and slowness and ignore you, are all reasonable concerns.
This, however, is not the case.
LEARNING TO SURF AT AN ‘OLDER’ AGE
Is it possible to learn to surf at the age of 50? Or Older? Yes, as long as you have a reasonable level of physical fitness and flexibility. Learning to surf is primarily a matter of persistence, so if you’re ready to keep trying, you can learn to surf at that age.
Consider signing up for a beginner’s surf lesson, getting in shape, improving your swimming skills, selecting the perfect surfboard, and avoiding comparing yourself to others if you’re over 50 and want to learn to surf. You’ll be out there enjoying those waves before you know it!
Surfing has no age restrictions, and it’s never too late to start (even if you’re past 50!)
SURFING IS A GREAT WAY TO:
Keep in shape,
Improve your mood,
Push yourself,
Feel younger for longer.
Meet new people
This comprehensive guide will help you learn to surf at 50. It has been compiled to answer your questions and provide support along the process. I’ll go over some of the advantages of this enjoyable outdoor activity and provide a step-by-step tutorial to get you started.
Tips on how to learn to surf aged 50 years or older.
1. WORK ON YOUR FITNESS
Surfing is physically hard at any age, but especially so as you become older.
You’ll need to use your entire body to manage your weight as you paddle out, pop up on your board, and ride those waves. You’ll also be out for extended periods, so you’ll need plenty of stamina to be safe.
As a result, you should begin by increasing your physical activity and improving your fitness. The more physically fit you are, the easier it will be to learn to surf.
To be clear, you don’t need to be in marathon shape when you’re initially learning, but every little bit helps. Here are some suggestions:
Improve your cardiovascular fitness. Take long walks, begin running, ride your bike, or even run around with your children.
Put a premium on functional strength. If you want to keep control, you’ll need good core strength and good arm power for paddling.
Keep in mind to stretch. Stretching, flexibility, and balance should be part of your daily routine to avoid injury and improve your surfing skills.
Most of these surfing workouts may be done from the convenience of your own home. Simply go to YouTube, and you’ll find a plethora of online workouts that will help you get in shape quickly.
Read this article on surf fitness to get started.
2. TAKE SURF LESSON
While you can certainly teach yourself to surf, it’s so much easier and progress a lot quicker when you use the help of a local surf school or surf camp.
For beginners aged 50 and up, these can be invaluable because they give you confidence in your developing talents while also assisting you in improving your technique. You’ll also learn the proper surf ethics and gain a deeper understanding of the water.
3. IMPROVE YOUR SWIMMING ABILITIES.
If you don’t know how to swim, turn off your computer right now and enrol in some swimming classes. Seriously! If you’re not a great swimmer, there’s no way you’ll be able to stay safe in the ocean.
It is essential to keep in mind that the water is a massive force.
Because waves and currents can be powerful, and sea conditions can change in the blink of an eye, putting you in danger, knowing how to swim is essential. You must be capable enough to look after yourself and get to safety.
Because you’ll be starting in relatively shallow water, you don’t need to be a particularly great swimmer to begin. It is, nevertheless, necessary if you wish to proceed beyond the beginning stage.
Swimming in the ocean as much as possible will help you become a better swimmer. This will provide more authentic conditions than simply going to your local pool, and it will give you more confidence in ‘wild swimming.’
4. SELECT THE APPROPRIATE BOARD FOR LEARNING TO SURF
When you first begin, make sure you select the appropriate surfboard for a beginner like yourself.
Look for longer, thicker, and wider boards because they provide the most stability and make learning easier. Surfing beyond 40 or 50 is best learned on larger boards like 9 feet + beginner soft top surfboards. More info on beginner surfboards is detailed in this article.
Avoid smaller boards as much as possible; they are more difficult to manage and can lower your confidence when you first begin. Your local surf shop can assist you in determining the suitable size and shape of a surfboard for your needs and abilities.
5. DON’T MAKE COMPARISONS TO OTHER PEOPLE
I know it is easy to say so rather than act, but you must avoid comparing your surfing abilities to others.
So, what if you’re in a group surf session and someone in your class can show there in 5 minutes, but you’re still having trouble an hour later? Maybe he or she has already learned to surf and is just brushing up on their skills. Perhaps they’re naturally sporty, whereas you’ve spent the last few years lazing on the couch.
Everyone is on their own individual path.
If you want to feel proud of yourself instead of comparing yourself to others, remember that you came up and took the risk of learning to surf at a time when many others would not.
Concentrate on your own game, be proud of your drive and dedication, and work hard to reap the rewards.
If you haven’t already, take benefit of the opportunity to learn to surf. You’ll notice a variety of mental and physical health benefits as soon as you begin.
What are the advantages of learning to surf at the age of 50+?
Learning to surf will change your life for the better, especially if you are over 50 years old. Check out below a few of the reasons behind this:
1. Surfing is a terrific way to stay in shape while having a good time and no more sweating it out for hours on machines in a dark, dingy gym! You’ll be outside, feeling the rush, inhaling in the fresh air while also getting in shape. Awesome.
2. Surfing is a fantastic cardio workout. All of that paddling, popping up, and riding will get your blood pumping, your heart pumping, and your body in terrific form.
3. Surfing is a fantastic chance to meet new people. When you’re over 50, it’s more difficult to expand your social group. On the other hand, Surfing makes you part of a close-knit group that will keep an eye on you and is there for you when you need it.
4. Surfing aids in the prevention of aches and pains. You will become stronger overall, your joints will become less achy, and you will become more flexible if you engage in regular exercise such as surfing. If you have to sit at your desk all day or have been groaning as you stand up recently, this is the perfect remedy!
5. Surfing is excellent for improving your coordination. When you learn to surf, you’ll notice a significant improvement in your motor skills. If you participate in other sports, this will pay off handsomely and help you age more gracefully.
6. Surfing is a fantastic way to improve your mood. All of that natural daylight exposure, fresh air, exercise, and community spirit will get your endorphins flowing, raise your mood, and, according to some studies, may even help to alleviate your depression and stress.
Don’t let your age stop you from learning to surf. The average age of clients at Swell on a learn to surf holiday is 38. This means we get plenty of people in their 50’s and 60’s that join us.
Want an example:
Clare, one of the owners of Swell Surf Camp was never very interested in learning to surf, then at 52 decided it was time to get in the water and learn surfing. Now she goes for a surf with her surf friends whenever she has a chance. This is Clare 3 years after her first surf sessions, aged 56 (see the smile on her face)
So what are you waiting for? Sign up for surf lessons at your local surf beach, or join us in the warm and mellow waves of the Dominican Republic for a life-changing surf & yoga retreat holiday
ABOUT SWELL
Teaching people the sport of surfing in a safe, quick and fun way is what we specialise in at Swell Surf Camp. We have taught 1000’s people the basics of surfing.
BOUTIQUE SURF HOLIDAYS IN THE CARIBEAN
Swell offers full surf packages holidays
Interested in changing your life to see the health benefits of learning to surf?
Learn how to discover, catch, and stay on unbroken “green” waves by positioning yourself correctly in the line-up.
CATCH MORE WAVES BY SITTING IN THE RIGHT SPOT!
This article will provide you with a basic understanding of better position yourself to catch green waves. It covers the fundamentals of paddling into an unbroken wave and “sticking” on these “green waves” without nose-diving, passing over the wave, or becoming caught on top of it.
Keep in mind that this is one of the most difficult skills to master as a beginner surfer. Nothing can ever take the place of practice. The longer time you spend in the water and the more waves you attempt to catch, the better.
The theory presented in this article will supplement your practice and, in most cases, will speed up your progress and save you a lot of time and frustration.
CATCHING UNBROKEN WAVES
Positioning & where to sit
How to locate and position yourself to catch a long green wave:
1. Recognize the various stages of a wave
PHASE 1: SWELL LINES
It is only a bump in the road. At this point, catching this wave is impossible. This lump is merely a forewarning that a wave is on its way.
PHASE 2: UNBROKEN WAVE
This is the place to look for a “green wave.” This waveform is great for paddling because it is unbroken and has the right strength and steepness. You can’t catch at phase 1 because it isn’t steep enough, and phase 3 is too vertical for you to take off. ( better surfers with shortboards can take off here)
PHASE 3: BREAKING WAVE
The peak of the wave has arrived. On the flat water, the lip is already beginning to crash down. The wave is too big and steep to catch at this point, especially for inexperienced surfers.
PHASE 4: WHITE WATER
The wave has broken and has turned into a whitewater wave.
Real-world example of the different phases of waves
Prepare for a Green Wave by putting yourself in the right place.
Sit around 4 to 5 meters (15 feet) away from the majority of the waves.
Why?
The reason for this is that if you are waiting at a specific location where a large number of waves are breaking, the moment you turn around and paddle for a wave, you will either be catching a white water wave that has already broken, or you will be getting the wave crashing on top of you.
A good spot to take off, not too mellow / not too steep.
What is the status of the more experienced surfers? They probably know more about where to sit in line than you do.
This does not imply that you should sit next to them and wait for their waves. It’s merely a guide to help you figure out how far out you should paddle.
Where to sit is also variable on a couple of different aspects:
The paddle fitness of the surf (how fast can he/she paddle)
What kind of board the surfer is riding (longboards can catch ‘flatter’ waves more easily than shortboards.
Beginner surfers are frequently found sitting much further out from the wave than more experienced surfers. This doesn’t make much sense; either the waves aren’t breaking as far out that day, or they aren’t breaking at all.
In other words, if you see waves breaking a long distance away from where the expert surfers are sitting, this indicates that it is an “unusual” and larger set of waves (which you most likely do not want to catch as a beginner surfer!).
Look for lumps on the horizon. A “phase 1” wave that will transition into a “phase 2” wave roughly 3 to 5 meters behind you is what you’re searching for.
Choose a wave, turn around, and paddle for at least 8 hard strokes. You should paddle hard enough to keep up with the wave’s pace as it transitions from “Phase 1” to “phase 2.”
ADDITIONAL TIPS FOR CATCHING MORE WAVES IN SURFING
KEEP LOOKING
When paddling for a wave, look behind your shoulder. Taking a couple of glances behind you is the only way to determine whether you need to paddle more, paddle less, or even stop paddling for a short period, depending on the shape of the wave.
It also prevents you from “dropping in” on individuals (for further information on what this means, see “Surf Ethics”). If you glance behind you, you’ll be able to tell if the wave was too steep (phase 3), too weak (phase 1), or just right (phase 2), and hence why you failed or succeeded in catching an unbroken wave.
Many inexperienced surfers fail to look back at the wave and end up paddling incorrectly. They either get smashed by the wave or catch a white water wave. Without looking back and understanding what happened, you will never be able to learn from your mistakes.
A BIGGER BOARD MAKES A DIFFERENCE!
It will be easier to catch unbroken waves if you have a larger board.
PADDLE SPEED
Paddling fast enough to match the speed of a wave is the key to catching “green waves.” You will spring up and surf faster if you can “capture the momentum” of the wave. Green waves are easier to catch on big boards than on small boards because they paddle faster.
Because they move around a lot, better surfers catch more waves. If you notice a lump in the horizon, consider whether it is a larger wave that will break further out to sea or a smaller wave that will break closer to shore.
It will get easier to paddle around and position yourself to catch unbroken waves the more experience you gain in reading waves. The more proactive you are, the more likely you will be to catch waves. See “How to Read Waves” for additional information on wave reading.
Catch and “Stick” on a wave that isn’t broken.
White water waves differ from unbroken waves in the following ways:
The force of a whitewater wave pushes you forward. You might catch whitewater waves during your first sessions when you first start surfing. Because the momentum of the broken white water wave drives you forward, white water waves are very easy to catch.
Most whitewater waves may be caught without even paddling.
Gravity is the force that creates an unbroken “Green” water wave. The first thing you need to know about catching and “sticking” on green waves is that the white water does not “push” you ahead. Gravity is the force that allows you to enter the wave. You must imagine yourself paddling down a moving “slope.”
How to “stick” to the unbroken wave without getting swept away?
Long, forceful, and deep strokes should be used when paddling. This is especially critical when catching waves that aren’t broken.
When paddling, you must give everything you have, especially when you feel your surfboard’s tail rise: this is a crucial moment to “Stick” on it.
The way you stand on your surfboard is crucial. As we saw in the How to Paddle on a surfboard article, excellent paddling technique is achieved through precise paddle strokes and optimal body placement on the surfboard.
When your chest is exactly centred on the width of the surfboard, and you are at the correct height, you are in the correct position on the surfboard. Place your body high enough on the board so that the nose is about 3-6 centimetres (1-2 inches) out of the water while keeping your head up (imagining a soccer ball between your chin and the surfboard).
Your head and upper shoulders are likely to weigh 45 pounds (20 kilograms) or more! Consider how much of a difference it makes when you drop your head and bring it closer to the surfboard when you’re pulled up on a wave. This allows you to catch, stick, and descend the “slope” that is moving forward.
Many kids become accustomed to being pushed into unbroken waves by their trainers, which is beneficial for practice. When you’re pushed, however, you don’t have to lower your head to put weight on the front of your surfboard. If you’re disappointed because it’s difficult to catch green waves without the help of a surf coach, remember that shifting your weight towards the surfboard is the key to catching unbroken waves on your own.
It would help if you popped up at around 2/3 of the height of the wave. Once you feel your tail lift and you believe you have gained enough speed to continue gliding with the wave, give two final paddle strokes, place your hands on the board beside your pectoral muscles, curve your back, and jump!
VIDEO OF CATCHING UNBROKEN WAVES
ABOUT SWELL
Teaching people the sport of surfing in a safe, quick and fun way is what we specialise in at Swell Surf Camp. We have taught 1000’s of people the basics of surfing with our beginner surf camps
BOUTIQUE SURF RETREAT HOLIDAYS
The Caribbean: On the North Coast of the Dominican Republic
Swell offers full surf packages holidays
Are you interested in changing your life to see the health benefits of learning to surf?
Surfing is an incredibly demanding sport for both body and mind. Not only are you pushing yourself physically, but you have to concentrate and focus on reading the ocean at all times to catch the best waves. That’s why being in the know about surf-specific fitness can make all the difference between getting out the back nice and easy, or getting a big set on your head, rag-dolling all the way back to shore. With this surf blog, we hope to give you the tips that bring you that little bit closer to being physically fit to ace your next surf session.
SURF FITNESS GUIDE
This guide is aimed towards beginner surfers, weekend warriors and those whose sessions are few and far between. When learning to surf, the first few times when you come out of the water after a surf, you might not even be able to get your suit off because your arms are jelly from all the paddling. Sheer exhaustion, we’ve all been there!
If you’re planning a surf holiday or surf camp stay this summer, this article gives you the tools to physically prepare for it. We’ll talk about the main muscles used in the different actions and movements of surfing and explain how to train and stretch them for better surfing performance.
Fitness The Basics: Paddle, Pop-Up, Body Position
There are three main stages in the process of catching a wave. First is the paddle, an explosive movement with the arms. Next is the pop-up, using the upper body to lift ourselves enough to bring the legs into our stance position. And finally, once we are on the wave we use our legs, core and upper body to stabilise and create momentum on the wave-face (pumping) and to perform maneuvers.
Which Muscles Do We Use When Surfing?
It’s pretty safe to say that you use most of the muscles in your body when you surf, some more than others and some in different ways. The main muscle group we use when paddling is the upper back ones. This provides us with the power needed to accelerate up to a similar speed of the wave itself. It is usually only a few strokes on each arm before popping up. In other words, it is a strength and power move, which we can train to its fullest potential. Our shoulders are also used in the rotary motion of the move but generally only start to burn after a long paddle out, so endurance is the main factor for this set of muscles. The triceps get a good workout with duck diving and with the pop-up, as do the chest muscles. Again, the pop up is an explosive move so we can train our muscles to perform this more effectively. And finally, when we’re up and riding on the wave face, we use the core (in all planes) and legs for stabilisation and movement.
Training for surf fitness
Training to go on holiday… Really? Every season, we hear a few guests say something like: “I wish I came on this trip in better shape.”
The amount of preparation you want to do is up to you and depends on your current fitness level and your objectives for the surf retreat. We often have guests that really look forward to either progress their technique or surf 3 or 4 hours every day since they don’t have access to quality waves back home. Here are a few tips if you feel your fitness level could limit you on your next trip.
Surfing &/or Swimming
The best way to be physically ready for a surf trip is… to surf! Even though you run, ride a bike, go to the gym weekly, etc. You might not be training your body in the most effective way to prepare for a surf trip. A significant part of surfing is paddling. Even if the waves at home aren’t great, just getting out there for a paddle will train the muscles needed for paddling. Don’t have waves at home? See the paragraph below on swimming.
If you can’t surf at home, the second-best option is to go swimming at your local pool. In the last 4 to 6 weeks before your surf trip, try swimming at least twice per week. Don’t worry about your swimming speed. Try to find your rhythm and do laps for a total of 20 minutes or more if you can (stop between laps when needed). Very important: use the “freestyle” technique (also known as the “front crawl”).
Stretching &/or Yoga
Mobility is essential for surfing, for both performance and to limit the risk of injuries. Stretching poses that focus on your back, shoulders, arms, hamstrings and hips are often the most recommended. Guests over 40 often struggle with their pop-ups if their hips are too tight. Core strength is key for surfing and yoga can be a great way to build it, although it is not always for everyone.
The more you feel that you can move freely, the better. Especially for your hips (for pop-ups) and shoulders (for paddling).
Training & Cardio
Sit-ups, squats, burpees, push-ups… Those are basic exercises that will build core, shoulder, arm and leg strength and endurance. Training these muscles will help you catch more waves and surf for longer sessions. Every guest has their own fitness level and body type. You or a fitness coach that knows you personally will know what exercises you need to focus on most, how many sets, reps and rest suit you, etc. For cardio, you could consider going for a run or a bike ride.
According to the HHS, adults should aim to get 150 minutes to 300 minutes of moderate physical activity or 75 minutes to 150 minutes of vigorous-intensity aerobic physical activity a week. If you do not reach these targets, it would be a good idea to try to start training at least 4 weeks before your trip. The more significant improvement in strength or endurance you are looking for, the more time you will need (sometimes 12 weeks or more are preferable).
More ideas for training on our Magazine:
Nutrition
Eating healthy is obviously important and complementary to exercising if you either want to feel energized, lose fat or build muscle before your trip.
It’s about finding balance…
Surfing is a sport that requires both a good amount of strength and mobility. For example when you paddle hard to catch a wave or when you push up to pop up, you need shoulder and arm strength. You also need fluidity to be able to slide your legs under your chest during pop up, when you twist your body during carves, etc. It’s a good idea to aim for balance. If, for example, you go to the gym often and feel that you are quite strong but not very flexible, focus on mobility exercises. If you think you are already quite flexible, focus on strength conditioning.
ABOUT SWELL
Teaching people the sport of surfing in a safe, quick and fun way is what we specialise in at Swell Surf Camp. We have taught 1000’s of people the basics of surfing.
Age? Well the average age of a Swell client is 39
Swell offer 2 exciting places for learn to surf holidays:
The Caribbean: On the North coast of the Dominican Republic
Interested in changing your life to see the health benefits of learning to surf?
Unless you haven’t been paying attention to new water sports crazes, you’ve probably seen a huge increase in the number of people getting into foil boarding; whether it’s using a foil for surfing, kitesurfing, or the relatively new wing-foiling (covered in more detail below).
LEARNING TO FOIL / WINGSURF
WHAT IS A FOIL?
It was in Hawaii that the hydrofoil was first developed. The idea is to use a blade below the water to ‘lift’ the board you are using (whether it’s a SUP, kiteboard, or surfboard) clean out of the water. The board is attached to a mast which is attached to that blade. Once the blade lifts at a certain speed, the mast comes out of the water and then no part of the board is actually touching the water. We will talk about how foiling feels a little later in this article; the very reason for its existence is how that ride feels.
Early foil models were heavy, extremely difficult to use, and really quite dangerous. These hand-made foils were also very expensive. After several manufacturers came up with various foil models over the years, in around 2014, foil models had improved and started appearing in more numbers on local beaches. However, they were still too fast, generally unstable and very difficult to ride, as well as being expensive. Accidents were common and often resulted in nasty injuries.
The speed of design improvements has been impressive and the good news is that today, all manufacturers are building easy to use, less expensive, stable, fun foils which suit all kinds of surf/water conditions. They range from inexpensive plastic foils, through aluminium and fibreglass construction, all the way to the top-of-the-range carbon fibre foils.
Even better, many are of a modular design, meaning that you can interchange the various parts as your level of foiling improves.
HOW DOES IT FEEL TO FOIL COMPARED TO RIDING A NORMAL KITEBOARD OR SURFBOARD?
This question is rather like trying to describe how it feels the first time you ride a wave; it’s really hard to put it into words.
It’s like no other form of board riding you have ever undertaken before. The reason for this is that you are simply floating: Imagine gliding over a sea of soap suds where the suds keep you on top without sinking yet you can’t feel them beneath you. Your foil makes no sound at all as it carries you, there’s no slapping of water that you always get with a board in contact with water. It’s spookily quiet as you glide effortlessly through the water. People have described it as a magic carpet ride and I would have to agree.
Also, the momentum of foils and the way they travel through water means that you only need light winds for either kiting or wing-surfing. You can also travel at much faster speeds and turn further upwind or downwind than you can with a regular twin-tip kiteboard.
If you are used to riding a twin-tip kiteboard or a directional surfboard, you will know that you steer the board using your heels and toes. Only two things to remember; heels will dig in to ride upwind and toes will turn the board downwind. Let’s refer to this as the ‘roll.’
With a foil, there are three things to master. You’ve got the toe and heel operation (the roll) but you have also got a front and back axis (the pitch) to deal with. Getting the ‘pitch’ of the foil right is essential to keep the board out of the water. Too much leaning back and the foil will literally fly out of the water. Too much pressure forward and the foil will sink the board. Foils are sensitive and require only a tiny movement of your body forward or backward to completely change momentum.
The roll is also harder to come to terms with on a foil. If you can imagine the roll on a regular board occurs immediately beneath your feet and the adjustment you make results in an instant turn. With a foil, the blade is well beneath you, anything from 40cm to 110cm (depending on the length of the foil’s mast). This means that the adjustment required is larger and the turn takes longer to effect.
Then we have to look at how weird it feels to be hovering above the water. Everything you have ever learned with kiteboarding or wind-surfing is about the board being in direct contact with the ocean. The height you can achieve with a foil is at once exhilarating but it’s also scary. No matter how good you are as a kiteboarder, surfer, or windsurfer, learning to foil will make you feel like a noob all over again. It sounds like a bit of a nightmare, doesn’t it? But the reward, the reward………..your soap-suddy, dreamy cruise through the air will make all the faceplants and aching thighs well worth it. It’s just a learning curve you must go through to get to the pot of gold.
HOW DO I LEARN FOILING?
There are several different ways to learn to foil. If you already kitesurf well, then you can pick up foiling using your kite skills to generate the power required. If you are an accomplished windsurfer, then moving to wing-foiling will not be too big a step up.
If you don’t kitesurf, surf, or wind-surf already, then your options are as follows: 1. Learn to kitesurf first using a regular twin tip (this might sound difficult but actually, the learning curve with kiting is much faster than with regular surfing and progress can be rapid. 2. Learn to wing-foil (see below for our course options at Swell). The great thing about using the wing to start foiling is that control of the wing is easier and even faster to master than control of the kite. 3. Use a boat-tow to start. However, whilst using a boat to tow you might seem like a good option, in reality, it’s cheating somewhat and with this method, you won’t utilize some of the balance skills which are vital for foil control once a boat is not towing you. Another problem with a boat tow is that the boat tends to do the steering for you, so you are not learning that skill either. Lastly, unless your boat pilot is well-versed with foiling themselves, they won’t know the correct speed to keep you above the water and safe.
Whichever method you choose, you should begin your water experience with a short mast on the foil (shorter = easier). The better you get, the longer you want your mast to be. You will also use a bigger board at the beginning to give you as much stability as possible.
WINGSURF FOILING; A PERFECT INTRODUCTION TO FOILING WITH NO PREVIOUS EXPERIENCE
As we’ve mentioned above, wingsurf-foiling is an ideal choice if you don’t already kitesurf and you want to get straight into riding a foil. Wingsurfing is growing quickly in popularity and it’s easy to see why.
Unlike a kite, the hand-held wing is much simpler and safer to use. There are no long lines to put out, no potentially dangerous launch to master, no risk of crashing the kite and not being able to relaunch it. The equipment is easy to put together and the wing is quickly inflated. A leash attaches the wing to the rider in case of falls and handles are positioned along the center of the wing to guide it; it’s very light in the hand. In fact, there are no discernible disadvantages to using a wing to foil.
Wings are sold in various sizes to suit wind conditions and rider size. A good wing-foiling school will have the correct size of the wing for your lessons. You will be able to wing-foil in just 12 knots of wind. All you have to do is inflate the lightweight wing and enter the water.
WHERE CAN I LEARN TO WINGSURF FOIL
SWELL LEARN TO WING FOIL COURSE
Cabarete, Dominican Republic, is already a world-renowned kite surfing destination, with steady side-on trade winds and warm Caribbean water: Now foiling is taking over as the fastest growing sport. You can come and stay with us at Swell and take a 10-hour foiling course for $795 USD (one person) or $636 USD each if two guests are learning at the same time.
Cabarete on the North coast of the Dominican Republic is one of the best wing foiling spots in the world!
Great conditions for Wing foilers of all levels
ABOUT SWELL
We are a purpose-built retreat for people that are looking for an active water sports holiday. We offer learn to surf, kitesurf and wingsurf packages for clients staying with Swell
WHY SURFING (AND LEARNING TO SURF) IS ONE OF THE BEST CHOICES FOR A HEALTHY & HAPPY LIFE.
SURF HEALTH
The great thing about surfing is that it’s approachable for people of all ages and all walks of life. Surfing is awesome and a life-changing activity that only requires courage to fly in the ocean. The best part about surfing is that it changes the entire lifestyle by adding thrill and adventure. Below, we highlight certain aspects to show why surfing is the best way to stay in shape.
ALL IN ONE WORKOUT
At first, it’s obvious that surfing is a full-body workout. Your every move on the water requires a combination of physical strength, stamina, and cardio. But don’t worry if you are weak at one thing: it’s not a prior requirement to get started. The only thing that it requires is the energy and motivation inside your heart to glide along the ocean waves.
There is not any specific level of skill and experience to start surfing. Going from paddling to popping up on your surfboard will cardiovascular and upper body strength, and keeping yourself stable on the board will work your legs and core. By following these steps, you are utilizing the entire body while having the time of your life.
Besides physical fitness and impressive anaerobic effects, this sport also brings strength in some other life aspects:
STRESS RELIEF
Spending time with nature, enjoying precious moments, and bringing physical strength to use, combinedly to help to reduce strength and anxiety levels. Regular surfing makes you feel similar to morphine. It can produce an ecstatic feel and an optimistic stance on life.
IMPROVED SLEEP
It’s a well-known fact that exercise decreases sleep complaints, especially sleep disorders, and their effects are pretty much similar to sleeping pills. After paddling for a few hours and riding on the water swells, your body is ready for a healing slumber.
INCREASED VITAMIN D
Exposure to the sun along with a healthy workout causes the increased production of Vitamin D inside your body that helps in calcium absorption, improved body structure, and regulation of body functions.
MIND FULLNESS
Surfing helps you in developing your focus by putting everything else aside. Your concentration is on your body language to keep yourself on the board, merge your heartbeat with the surf, and fly in the ocean.
BUILDING BALANCE:
Exercising balance in every sphere of life is key to success. Surfing well requires maintaining balance on the board and keep enjoying a healthy and vigorous ride. Your balanced coordination on the board prevents you from serious injuries. Surfing requires a good balance, and keep practising the sport helps you in developing the skill.
Regular surfing strengthens your every day’s fitness and helps you in protecting against common age-related somatic issues like arthritis, tendonitis, and many more.
Many surfers also refer to practice some other exercises, such as pilates and yoga, to improve their core strength, flexibility, and balance and enhance their surfing abilities.
“Core” itself points out the vitality of muscles, including posture to upper-back and lower-back strength.
THE POWER OF PASSION
Perhaps the most impactful benefit of surfing lies in the connection you make to the sport. Your dedication to the sport can give a boost to your overall physical health.
Once a surfer starts feeling less like hard work, the training becomes a piece of enjoyment. Once you are passionate and ambitious for the sport, you try to work out regularly to stay in shape and keep training to become even better.
Connecting to an activity that provides you with a source of enjoyment, along with the workout, makes you feel easier than regular exercise at the gym. A study published in Marketing Letters highlighted that enjoying such activity brings more comfort and relaxation to you.
The reason behind this is that the part of fun diverts your attention from the required effort.
Moreover, it also reduces the tendency to overeat or have extra calories after the training session.
A LIFETIME OF FITNESS
It is not a one-time activity to put yourself in shape. If you are passionate and ambitious about something, you carry it throughout your life and put all your efforts to maintain it. Especially, physical fitness is an ongoing practice that prolongs your shape and strength. Besides physical health, engaging in activity like surfing can also bring a more peaceful mind to you as well.
Even if you don’t surf regularly, the time you spent on the waves has long-lasting effects.
If you feel bored with your workout routine and ready to switch it with a healthy activity?
Surfing might be the best alternative, and one of your favourite hobbies as well.
BALANCE
Balance is a key to surf on the waves. Once you lost your balance, the whole drama is over, and it might cause an injury to you. The best way to learn about balancing is riding as much as you can.
However, mostly the rides aren’t enough long to get yourself trained because all water swells don’t convert into a wave. Performing lunges and squats can strengthen the glutes and leg muscles, which ultimately helps you to maintain your balance on the board.
If you don’t have a balance board, you can achieve it by closing your eyes and standing at one leg for up to 30 seconds and repeating it again and again. Like other skills, it requires your patience and consistency, so don’t lose it.
DIGITAL DETOX
Another great health benefit of surfing is that (at least for now) it also means you are completely disconnected from digital distractions like phones, computers, TV and social media. When you are out in the water it’s just you, your fellow surfers and the elements for you to enjoy.
At times I have gone out for a 2-hour surf session, barely caught any waves, and still come back feeling happy and fulfilled. Enjoyed a sunrise view, did my paddle exercise and had no distractions on my mind.
SURF FITNESS EXCERSIZES
MAXIMIZE YOUR SURF HEALTH
The following are great examples for people that want to get surf fit before their holiday or to keep doing at home, theses exercises will greatly improve your surf sessions.
CORE: SIDE PLANK WITH REACH THROUGH
The strength of core muscles is responsible to stabilize your torso to help you in balancing, paddling, and rotation through turns.
The side plank can easily strengthen the layers of your obliques, complying with the rotational component. Lay down on your side, bend your knees, and prop up your upper body on your elbow.
Raise off your hips by holding for 8-10 seconds, give a rest for 10 seconds, and do 1-3 sets of 12-15 reps at each side.
LEG STRENGTH: SINGLE LEG SQUATS Stronger legs help you in maintaining balance and staying on board for a long time. Whether you are a beginner or an expert, single-leg squats will help you in developing the core and leg strength to paddle at your best and keep enjoying for a long time.
Stand on one foot and lift the other one about 5-7 inches off the ground. Align the knee of the standing foot with the middle toe, lowering down by bending your knee at 45 degrees. You should keep your back straight and head aligned with the shoulders.
Hold for 3-5 seconds in the lowest position and do 3 sets of 5-7 reps on each leg. With time and practice, you can increase the depth of the squats to make it challenging.
PRE-SURF WARM-UP: DEEP SQUAT WITH OVERHEAD REACH Before you start surfing, you need a quick warm-up to give relaxation to your hips and shoulders and set them ready for paddling.
For this purpose, put your feet apart a little wider than the shoulder width. You can slightly turn out your toes to release the tension.
Keep your gaze forward and your torso straight, squat down and touch the ground with both hands for a while, then stand back up. Now, circle your arms and raise them towards the sky.
Repeat this 10-15 times to warm up yourself for the paddling.
SURF PADDLE FITNESS
A surf session is more paddling than surfing on the waves with a ratio of 95% to 5% . If you have not trained your paddling muscles, then your session will be quite short. You can strengthen your paddling muscles with a simple pool workout. This will considerably add to your strength and power.
WARM-UP:
Spend 5-7 minutes on mixed strokes swimming, such as freestyle stroke, butterfly stroke, breaststroke, backstroke, and sidestroke.
MAIN SET:
2 x 100 yards at an energetic pace with ease and comfort.
3 x 50 yards at a relatively faster pace than the previous one, following with the set of 10 pushups after every 50-yards.
4 x 50 yards at your maximum power.
Relax for 2 minutes after every set, and rest for 15-20 seconds after every round.
BREATH CONTROL
Add some underwater swimming, 3-5 sets. Also, consider swimming at a high pace with all your power for at least one round. When getting near the wall, turn quickly and hold your breath under the water as long as you can. This is the perfect simulation for paddling and duck diving.
Besides breath control, it also mentally prepares for such a situation where someone needs to stay underwater.
To make sure your safety, try to practice it with your friend or a person around. The more important is that you remain calm and relaxed, especially when you need air at the peak.
To sum it up, we think learning to surf is one of the best long terms investments you can make for your mental as well as physical health. The fact that it is great fun and it gives you an incentive to travel to exotic place around the world to surf is an added bonus.
Length:
Minimum commitment 8 months, longer is possible and preferred
Position:
Surf instructors, surf guides
Where:
Cabarete, Dominican Republic
Bali, Indonesia
Requirements for surf camp job in Cabarete, Dominican Republic
Previous teaching experience & ideally ISA qualified
Swell has set whole new standards in accommodation and guest experience of surf camps.
Our place has a unique vibe and we have great clients, mostly professional people, who stay with us. The work can be 7 days a week when we are really busy but we have 3 coaches full time and normally between 6 and 12 people taking lessons at any one time. Our surf coaches have quite an easy run compared to European surf schools, though work starts early (6.30am) it is done by lunchtime. Then we like our coaches to socialise and take part in other fun activities with the guests. If you read our Trip Advisor reviews, you will get a sense of how important the staff mixing with the clients is to the overall success of Swell.
We provide accommodation and daily breakfast + 4 dinners (eating out in Cabarete costs just a few dollars for other meals). Salary will vary dependent on skills offered and experience. Spanish is not essential but is an advantage.
SWELL BALI SURF CAMP JOB OPENING(S)
in 2021 Swell is opening a new surf hotel. Located in the cool surf town of Bingin on the SW coast of Bali. With world-class waves such as Bingin, padang padang, Impossibles and Uluwatu within a few minutes.
For Swell Bali we have the following Surf Camp Job positions open:
Surf guide / Surf Instructor
Needs to be an advanced surfer.
Have experience surfing in Bali
Good communication skills
Fluent in English and Ideally some Indonesian
Experience in hospitality.
Interested in working for Swell?
Fill out the form below, we get lots of interests from people, so double-check if your info is correct and up to date since incomplete applications will not be considered.
About Swell
We provide a quality surf holiday for surfers of all levels. The Surf & Yoga Holiday is a popular package where clients learn to surf and we teach Yoga in our garden 3 times a week.
The accommodation at Swell is of the highest standard found anywhere in the world for a surf camp. Stylish rooms and comfortable beds + AC and Fan and Ensuite bathroom
Paddling is arguably the most important aspect of surfing. In fact, we probably spend 90% of our time in the water on our stomachs paddling, not on our feet riding waves. So, whether you are you a beginner surfer who can’t seem to figure out a natural paddle technique, or you’re an intermediate or an advanced surfer who always seems to run out of steam on tough paddle outs, improving your paddle technique will ensure you have a better time in the water.
Either way, this article ‘how to paddle on a surfboard‘ is for you. Learn the proper technique that will have you gliding, streamlined on top of the water’s surface, and save your shoulders from that dreaded burnout pain. Whether you’re paddling out right in front of our Caribbean surf camp, or your surfing at home, these tips will help get you to the lineup as quickly as possible, fresh, and ready surf.
HOW TO PADDLE ON A SURFBOARD
START WITH A PROPER WARMUP
Paddling can be a bit of a workout, so you should warm up accordingly. Either when you hit the sand, or before you head out of the surf camp. When you paddle, you engage your shoulders and upper back, so be sure your warm-up activates both of those muscle groups.
Additionally, when you paddle, sit in the line-up, and ride waves, your hips are in a closed and locked position. It is crucial for longevity to perform exercises and stretches that will open your hips.
TIMING IS EVERYTHING, DON’T RUSH
When you arrive at the beach and strap your leash on, don’t just sprint into the water and start paddling madly. Relax, sit down, maybe stretch a bit, but most importantly watch the water.
What are the waves doing? How often are sets coming? Is there a channel to paddle out in? These are all things you must ask yourself and answer before entering the water. Wait for a lull between sets, and head into the water. Walk your board out until you’re in about chest deep water and then hop on and paddle.
surf paddle technique
POSITION YOURSELF ON THE BOARD CORRECTLY
Bad positioning plagues many beginner surfers, causing unnecessary drag and therefore hardship during their paddle out. If you’re too far towards the back of the board, the nose of your board will tilt up in the air, slowing your paddle.
Contrastingly, if you’re too far forward on your board, the nose of the board will sink underwater causing unnecessary drag. Find that sweet spot on your board, where the nose is gliding just above the surface, in calm water and remember where you are in reference to a marking on the board (like the logo).
ELONGATE YOUR REACH WITH EACH STROKE
Like swimming, when you learn how to paddle on a surfboard, your body should be as long and stretched out as possible.
With each stroke, you should extend your arm to its furthest possible length. Short and rapid movements will leave you exhausted, while long reaching strokes will send you forward, gliding efficiently over the surface of the water.
MOVE SLOWLY
Have you ever heard the phrase, “Slow is smooth, smooth is fast?” It applies directly to paddling. If you’re at a full sprint trying to paddle out, you won’t make it. You will tire long before you reach the lineup. Slow and smooth long reaching strokes will propel you quickly and efficiently.
DON’T OVERREACH ON THE FOLLOW-THROUGH
Pool paddle training at Swell
When you’re executing the “pull” phase of your paddle stroke, be sure not to drag your hands too far back causing downward (not forward) momentum that will slow your paddle. To execute proper paddle technique, pull your stroke back to chest level, then lift your arm straight out of the water and repeat. When you pull further than your chest, the last portion of your stroke will push your board downward causing you to lose your momentum with each stroke.
KEEP YOUR ELBOWS HIGH
If you watch 11-time world champion surfer Kelly Slater paddle, you’ll notice how effortlessly he moves through the water. Part of his technique that stands out is that he consistently keeps his elbows high. From the moment Kelly brings his hands out of the water, to the moment he extends his reach, he leads with a high elbow. Keeping your elbows high will increase the effectiveness of each stoke, by keeping your hand and forearm in the vertical position from the start of the stroke. Essentially, it will allow you to move more quickly with less effort.
DRAG YOUR THUMBS
This tip goes hand in hand with the previous tip of keeping your elbows high. If you keep your elbows high, your hands will naturally be low. The idea here is to not bring your hands too far out of the water. When your hand exits the water, it should almost drag on the surface next to you as you bring it forward for the next stroke. By dragging, or nearly dragging, your thumbs in the water as you bring your hands forward for each stroke, you save energy by not engaging your traps. This will allow you to paddle harder for longer and prevent you from burning out due to soreness.
KEEP YOUR LEGS AND FEET IN CONTROL
While it may be instinctual to kick and try to propel yourself forward, it will actually slow you down. Instead, keep your feet together with your ankles side by side as you paddle. While kicking your feet might help shift your weight forward to actually catch a wave you’re paddling for, when you’re paddling out you do not want your weight too far forward. So, keep those feet still!
KEEP YOUR HEAD STILL
Again, if you watch world champ surfer Kelly Slater paddle, his head is still. This may seem inconsequential, but it has a tremendous effect on speed and efficiency in the water. Any swimmer will tell you that keeping your head still will keep your weight centred, not moving it from side to side, reducing drag and increasing speed. The same principle obviously applies to surfing. If your head moves to you right, your body will follow, taking you off your trajectory, digging your rail into the water, and ultimately slowing you down.
YOUR SPINE IS YOUR FULCRUM
Similarly, to swimming when you paddle, your spine acts as a fulcrum as your body moves ever so slightly from side to side with each stroke. This slight movement is not intentional, but a byproduct of the reach. To ensure you’re moving correctly, it is best to envision you are moving with a metal rod going through your body from head to tailbone. As stated previously, your head should stay still while you reach out each stroke.
SPOT THE WAVE AND REACT
The final step to a good paddle out is a proper duck dive or turtle roll. As you paddle out, constantly look out to sea for oncoming waves. When you spot a wave headed your direction, whether it is whitewater or a cresting wave, you’ll want to initiate your duck dive or turtle roll approximately 2 meters from the breaking wave.
VIDEO HOW TO PADDLE ON A SURFBOARD
Just like with any aspect of surfing, practice makes perfect. The best exercise for increased paddle strength and efficiency is paddling out to surf as often as possible. Now that you’ve learned how to perfect your paddle technique, take the next step in progression and learn to properly duck dive and turtle roll by checking out our blog on paddling out!
ESSENTIAL TIPS FOR IMPROVING SURF PADDLING TECHNIQUE
Mastering your paddling technique can significantly boost your performance on the waves. These tips will transform how you move through the water, making every paddle count for more speed and efficiency.
KEEP THE NOSE OF YOUR SURFBOARD SLIGHTLY OUT OF THE WATER
Elevating the surfboard’s front slightly above the water surface is a fundamental technique for any surfer. This beneficial method lowers friction and drag, permitting you to paddle with enhanced speed and negligible effort.
Ideally, keeping the board’s top portion 2-5 cm (approximately 1 or 2 inches) out of the water hits the sweet spot between maintaining buoyancy and improving control while paddling.
Lifting the board’s front just a tad can dramatically uplift your paddling efficiency, making wave traversing to reach the crest easier.
Creating this gentle lift demands core resilience and exact body positioning. Engaging your core stabilizes your torso, which consequently aids this mild altitude. Such precision improves your ability to move swiftly on water and furthers maneuverability when aligning yourself for incoming waves.
In addition, mastery of this skill contributes significantly to energy conservation during extended surf sessions or when confronted with tough conditions at sea.
Benefits of keeping the board’s nose elevated
Keeping your surfboard’s nose slightly elevated above the water substantially enhances paddling speed by lowering resistance. This strategic maneuver aids surfers to move over the water effectively, preserving energy for prolonged periods or swift actions.
By keeping this position, you marry your spine with your rib cage and scapula, which is instrumental for comfortable paddling experiences. Engaging in back-endurance exercises like swimming or pull-ups fortifies extensor chain muscles, boosting comprehensive performance.
Consistent stretching exercises ensure a full range of motion during each paddle stroke for upper body flexibility.
Inclusion of pulling exercises in training schedules cultivates strength and power necessary for effective paddling. These activities also boost stamina, enabling surfers to uphold the best form throughout their time in the water without rapid exhaustion.
Energy system training is crucial in this scenario; it grooms the body to utilize oxygen more successfully during strenuous physical activity like surfing. In turn, each paddle stroke becomes more forceful and effective, moving the surfboard ahead with lesser effort from the surfer.
Keeping the feet united better emphasizes this process by decreasing counteraction against water flow across the board’s features that are created particularly to smoothly cut through the ocean waves.
KEEP YOUR CHEST UP
Elevating the nose of your surfboard establishes a solid foundation for efficient paddling, but lifting your chest is similarly critical. This stance ensures right body positioning and balance on the board.
With your chest raised, you rely predominantly on your belly, making sure not to press down with your pectoral muscles. This position prevents potential injuries by aligning the spine and shoulders accurately and also involves the core muscles significantly.
The action of keeping an upright chest while paddling improves breathing capabilities — vital for endurance in long surf sessions. Superior breath control means you can paddle for extended periods without exhaustion, preserving energy for wave-catching.
Furthermore, this posture ameliorates your view of upcoming waves and intensifies vicinity awareness, necessary for both safety and strategic positioning in the water.
BENEFITS OF MAINTAINING AN UPRIGHT CHEST DURING PADDLING
Maintaining an upright chest while on your surfboard significantly improves balance and stability. This posture engages the core strength more effectively, leading to improved stroke mechanics.
Consequently, each paddle stroke is more powerful, enabling you to move through water with less exertion. This stance also decreases the likelihood of injury by reducing strain on the back and shoulders.
Keeping the chest up allows you to maintain a streamlined position in the water, which noticeably reduces drag and saves energy for extended surfing sessions.
This method enhances paddling efficiency and also fosters superior performance during surfing activities. With improved stability and fewer efforts from paddling, you’ll have more energy to improve techniques like exhaling during underwater diving, or executing sharp turns.
The secret is to use core muscles effectively, which leads to better control over the surfboard design under different wave conditions. The next suggestion is to concentrate on lower body positioning, specifically keeping your feet together while paddling, to further refine performance on the waves.
KEEP YOUR FEET TOGETHER
Keeping your feet together while you paddle on your surfboard might seem a minor detail, but it leads to significant improvements in your surfing technique. This position minimizes resistance in the water, allowing for more fluid movements.
It’s not just about reducing drag; this posture aids in maintaining stability and control over your board. With feet together, surfers find that their weight distribution becomes more balanced, enhancing both speed and directional control as they glide across the waves.
The smallest adjustments often lead to the most impactful enhancements in performance.
The benefits extend beyond immediate performance gains. Surfing with feet together reduces the risk of lower body injuries by preventing awkward strains during high-intensity paddling sessions.
For those long days at surf camp or an intense surf trip aiming to catch wave after wave, conserving energy becomes crucial. Adopting this seemingly simple habit can make a substantial difference in stamina preservation and injury prevention, ensuring you get the most out of every session on the water without taxing your body unnecessarily.
BENEFITS OF KEEPING FEET TOGETHER WHILE PADDLING
Keeping your feet together while paddling on a surfboard improves stability and control. This position aids in maintaining a centred body stance, essential for efficiently traversing the waves.
By reducing drag, it enables surfers to move through the water more smoothly, preserving energy for extended sessions in the ocean. This technique also significantly contributes to enhancing overall paddling performance by endorsing a streamlined body shape.
Such positioning is fundamental for generating more power and speed during each stroke.
The skill of a surfer to keep their feet together refines their technique and significantly aids their balance on the board. It prevents unnecessary movements that could lead to falls or loss of momentum when catching waves.
Enhancing this skill ensures that every paddle propels them nearer to an ideal takeaway point with less effort and higher efficiency. Progressing forward, perfecting this part of surfing will surely lead to more entertaining and successful rides across the ocean’s surface.
Importance of Practicing These Techniques
Perfecting these surf paddling techniques is vital for anyone aiming to hone their skills on the water. With regular practice, surfers will discover that they move through the ocean more effectively, and also relish a vastly improved surfing adventure.
Effective paddling approach
Mastering an effective paddling technique is crucial for catching waves and enhancing your surfing experience. By focusing on rail surfing, coaches help surfers understand how to manoeuvre their boards with precision.
The key lies in regular practice, especially on non-barreling waves which prepare surfers for more challenging conditions. This preparation boosts takeoff make rates notably in wave pools where timing and positioning are everything.
An effective paddling approach also involves a careful balance of energy conservation. Swimmers know the importance of keeping their feet together—a principle that holds true in surfing as well.
This technique minimizes drag, allowing you to glide through the water more efficiently with less effort on each stroke of your arms. As a result, you can spend more time out there doing what you love—surfing—and less time feeling fatigued or frustrated.
QUESTIONS
No results!
WHAT’S THE BEST WAY TO CATCH WAVES WITH PADDLING?
Timing and commitment matter most. Spot the wave early, turn your board, and paddle hard with full strokes. Once you feel the wave lift your board, give 2–3 extra strong strokes before popping up. Many beginners stop paddling too soon—that’s why they miss the wave.
HOW CAN BEGINNERS IMPROVE THEIR PADDLING STAMINA?
You don’t need a gym membership—practice is best done in the water. But swimming laps, push-ups, and light cardio will help. When you surf, focus on steady, relaxed paddling rather than sprinting for every wave. Beginners often burn out fast because they paddle too frantically. Learn to conserve energy.
HOW LONG DOES IT TAKE TO GET GOOD AT PADDLING?
If you surf regularly, your paddling improves within weeks. But getting truly efficient takes months of water time. Most new surfers underestimate how much paddling is involved—surfing is 90% paddling, 10% riding waves. At Swell Surf Camp, we accelerate the learning curve by correcting small mistakes early so you don’t waste energy.
HOW DO I PADDLE FASTER ON A SURFBOARD WITHOUT GETTING TIRED?
Speed comes from technique, not brute force. Keep your body streamlined, pull deep strokes close to the board, and avoid splashing. Sprint only when you’re actually catching a wave—otherwise, maintain a steady pace to save energy. Most beginners waste power paddling too hard all the time.
WHAT COMMON PADDLING MISTAKES SHOULD NEW SURFERS AVOID?
Lying too far forward (nose digs underwater) or too far back (board drags).
Splashing with arms instead of pulling long strokes.
Dragging feet in the water.
Stopping paddling too early when catching a wave. Fixing these basics will instantly improve your wave count.
SHOULD MY LEGS BE IN OR OUT OF THE WATER WHEN PADDLING?
Your legs should be relaxed and kept together on the board. Beginners often drag their feet, which slows them down. Keep your toes just out of the water, and if you need extra balance, you can lightly cross your ankles. This helps streamline your body and makes every stroke more effective.
IS PADDLING ON A SURFBOARD SIMILAR TO SWIMMING?
Yes and no. The motion looks like freestyle swimming, but your chest is lifted and your body is balanced on the board, so it feels different. The big mistake swimmers make is using short, shallow strokes. On a surfboard, you want long, strong pulls with full shoulder rotation.
HOW CAN I AVOID SHOULDER PAIN WHEN PADDLING A SURFBOARD?
Overuse and poor technique cause shoulder pain. Keep your elbows slightly bent and your strokes smooth, not jerky. Also, don’t let your hands cross over the center line of your board. At Swell, we also stress stretching before and after surfing—flexibility prevents injuries just as much as strength does.
HOW DO YOU PADDLE CORRECTLY ON A SURFBOARD?
The key is positioning. Lie flat, chest slightly raised, and keep your nose about 2–3 inches above the water. Cup your hands and pull deep, smooth strokes close to the board. Don’t “splash” with your arms—paddle from your shoulders with controlled, efficient movement.
This article on how to paddle on a surfboard is part of the surf technique series for beginners.
Other articles in this series are:
Interested in learning all the essentials of surfing in an action packed water sport holiday in the Caribbean? Have a look at the surf holiday packages we offer, inlcluding our 1 week learn to surf holiday
Moms and Dads, tasked with planning family vacations, have so much to consider; Safety, Travel, Boredom, Fun, Food, Sleep, Cost; they all come into play when you try to plan the perfect active family summer holiday.
We don’t envy you the stress of the planning, but we do think we have just the answer to give you and your family the ultimate family, action-adventure summer vacation. We understand the magic ingredient on a family vacation; happy kids = happy parents!
THE DOMINICAN REPUBLIC HAS IT ALL
The Dominican Republic is a large Caribbean island with so much to offer. It has a really interesting history and strong culture dating back centuries and is the most beautiful and mountainous of all the Caribbean islands, topped with Pico Duarte, the region’s highest mountain (which even keeps snow on its peak during summer months!). It’s a water-sport, eco-touristic, adventure playground with such dramatic scenery and stunning beaches, you won’t believe your eyes!
We’ve put together a suggested itinerary for what we hope you will agree is the perfect active vacation below, with something to suit everyone.
This 7-night itinerary is just a guide and you can stay for longer or shorter, take rest days and add even more adventures to suit. We think that at least some or all of the suggestions below will add up to a perfect family summer vacation. Most suggestions are suitable for May to early September vacations and for kids aged 8 and up.
Swell is ideally set up for families; Mom does not need to cook (or clean up!), so it’s a well-earned vacation for her and dad too. Food on offer at the camp is loved by kids and adults alike and when we are not cooking at Swell, we are surrounded by great food alternatives to suit all diets.
Kids can enjoy our pool, the garden, our foosball table and the pool table at the camp. Swell is a small, secure environment with a permanently closed main door, so there’s no need to worry about keeping an eye on your kids. Medical facilities are good and close by.
OUR SUGGESTION FOR A WEEK-LONG ACTIVE FAMILY SUMMER HOLIDAY
Day One; Fly into Puerto Plata airport (airport code POP) or Santiago Los Cabelleros (airport code STI), or even Santo Domingo (airport code SDQ). POP airport pick up and drop off costs are included in our packages. STI, journey time 1hr 45m is +$160 USD per private taxi and includes pick up and drop off. SDQ, journey time 2hr 45m, adds + $360 USD per private taxi, including pick up and drop off).
Arrive at Swell surf camp and check into your room(s). As most flights arrive in the afternoon, you can wander 5 minutes level walk to the beach for a late afternoon beach-side drink and a bite to eat. If you arrive on a Monday, Wednesday, Thursday or Saturday, dinner is at the camp.
Mom (and dad) can relax and perhaps do some Yoga at Swell on a Monday, Wednesday or Friday at sunset. Start to get to know your fellow guests around a huge dining table, shoot some pool, play cards, Jenga or any of the other fun games and activities we’ve got in the camp.
Day two; up with the lark and off to the beach for your first surf lesson (surf lessons costs are included in our packages). Its light at 6 am so we make the best of these beautiful, warm sunrise mornings.
You will all surf together in warm, shallow Caribbean water, so nothing to fear for anyone who’s not a good swimmer as you can just stand up at any time.
You’ll come back to Swell at 9.30 am for a delicious breakfast (yes, we make food that kids love too!).
After breakfast, it’s back to the beach for another surf lesson, or if you need some rest, you can skip the 2nd surf of the day and lie by the pool or in one of our hammocks, or retire to your room to catch up on a bit of sleep.
The 2nd surf session returns at around 12.30 pm, so once you are showered and changed, perhaps it’s off to Gordito’s (great Mexican food, 150m from Swell) for fresh mahi-mahi fish, chicken, beef or pork tacos (tacos cost approximately $6 USD each).
The afternoon is spent on the beach at Cabarete Bay across the road from us, swimming and sunbathing, or trying a kite surfing lesson (kite lessons start at $72 USD per person per hour with one IKO kite instructor per student).
Mom can enjoy a massage or beauty treatment at a charming spa closeby. Finish the day with either a dinner at Swell, or at a beach-side restaurant outing organized by Swell staff on your behalf (prices vary, depending on the kind of restaurant you want to visit) or you can also just wander across to the beach to choose your own dining experience, from fish BBQ’s to pizzas, it’s all on offer in Cabarete.
Day three;Surf as per day two, but the 2nd surf session is replaced by an amazing Canyoning experience. Transport will take you an hour from Swell, deep into the canyon to begin the adventure of a lifetime: This is no lightweight sightseeing tour; you’ll be fully briefed by the trained safety crew and wearing helmets, harnesses and safety vests as you ascend through canyons and waterfalls to finally reach the Magic Mushroom, a true geological wonder of the World.
You will be jumping, rapelling and swimming though most spectacular scenery. You’ll need lightweight sneakers which can get wet; wet-suits are provided (cost is $89 USD per person).
Dine at Swell in the evening if there is dinner at the camp, or head out to the beach to eat beneath the pam trees.
Day four; Day off from surfing as you will be heading to the stunning Laguna Gri Gri for a charming boat ride through the mangroves to the ocean.
The color of the water here is something to behold.
After your boat trip, you will be taken to Playa Grande, a stunning white sand beach for a BBQ lunch on the beach and a swim in the sea (approximate cost of this trip is $55 USD per person + drinks, but prices will vary slightly depending on taxi-occupation).
Day five; Surf as per day one. Head to the beach for more kite lessons, or just relax for the afternoon, or go on a horse riding trip along the beach or through the hills and rivers (horse riding trips are $45 USD per person and are organized for you by Swell staff including pick up and drop off).
Day six; Surf as per day one. After returning to Swell at lunchtime, you’ll be picked up by TSM, a professional dive school and taken to Sosua where you will go out in the stunning azure water to snorkel and feed the many fish in the bay ($45 USD per person).
This snorkel trip lasts around 2 to 3 hours. You can enjoy the beach at Sosua with easy swimming and lots of dining on offer.
Dine at Swell in the evening if there is dinner at the camp or head to the beach.
Day seven; Surf as per day one. After lunch, off to the Monkey Jungle (15 minutes from Swell by taxi) to zipline through the forest and see/play with the squirrel and capuchin monkeys.
The Monkey Jungle is a well-run charity and your visit is not only fun but will also help provide medical and dental facilities for those who are unable to afford this kind of care.
Approx cost is $55 USD per adult and $35 per child for ziplining.
Entry to the Jungle without ziplining is $28/$20 USD. A taxi for 4 people costs $20 USD each way.
Day eight;Surf as per day one. Your flight will probably leave mid-afternoon, so generally speaking, our guests skip the 2nd surf session and head straight to the airport.
PRICING GUIDE FOR THIS ACTIVE FAMILY SUMMER HOLIDAY
A rough guide for this 7-night Active Family Summer Vacation, based on two adults and two kids sharing one of our dorm-style rooms with A/C (two beds on the upper level and a king, or two single beds below, en-suite shower and WC) is $3876 USD + any of the activities undertaken, food (outside of Swell) and drinks.
In two rooms next door to each other, the cost would be $4596 USD + any of the activities undertaken, food (outside of Swell) and drinks.
Please contact us for an exact quotation based on your ideal accommodation and itinerary.
Here are some more suggestions for you for other activities either to add to your active family vacation or to replace some of the suggested adventures above.
FISHING TRIPS
Swell can organize a wonderful big game deep sea fishing trip for you where you can try to catch your own Mahi Mahi, Marlin or other large fish species (if you are successful, we’ll even prepare it for you at the camp so you can enjoy it on a dinner night at Swell)! Prices vary depending on how many guests go on the fishing trip.
CAMPING/TREKKING ON PICO DUARTE
If you would like to head away from the beach for a few days, you can break up your beach vacation with a trip to go hiking around the Cordillera Central, commonly referred to as the Dominican Alps, a mountainous, green and cool region of the country.
The Cordillera Central stretches the entire length of the island. The Jose Armando Bermudez National Park here is home to the prestigious and magnificent Pico Duarte, soaring at over 3,000 meters (10,000+ feet) in height. One of the best-known hiking trails is la Ruta Cienega, which is approximately 23km and takes 3 days; this trip can be with or without the help of mules and is a great adventure for those who are looking for some real tranquility in the peaks and valleys. Prices vary.
WHALE WATCHING IN SAMANA
Late December through March sees the yearly migration of the humpback whales as they reach their breeding grounds off the coast of Samana, in the East of the Dominican Republic.
The whales are regularly seen off the coast of Cabarete as they pass us by, but organized boat trips to visit the breeding grounds are possible during those months. Please note that our minimum age at Swell during Winter months (December to April, is 13). Prices vary.
VISIT THE HISTORIC ZONA COLONIAL
This area of the island’s capital, Santo Domingo, is where Christopher Columbus first arrived in the Dominican Republic.
The Zona Colonial is a vibrant area of stunning old buildings steeped in history and culture. Known for a busy street/cafe dining and music scene, it’s well worth spending a night in this area to experience the ‘real’ history of this beautiful island.
We recommend staying at a place like the Hodelpa Nicolás de Ovando, close to all the bars and restaurants and itself a historic building dating back to 1502. Santo Domingo has excellent shopping too!
VISIT THE ANCIENT PORT OF PUERTO PLATA
Only 30 minutes from Swell is the historic town of Puerto Plata, a fort/harbor town, dating back in parts as far as the 16th century. Puerto Plata’s charming timber buildings are host to many shops and restaurants and the Malecon is a charming beachside stroll.
PLAY GOLF
Here in the Dominican Republic, we have some of the Caribbean’s finest golf courses. Playa Grande and Playa Dorada are both quite close to Swell. Playa Grande, a Robert Trent Jones course, is widely thought to be one of the best links courses on the island; it’s only an hour’s drive from us.
Playa Dorada, also a Robert Trent Jones course, is just 20 minutes from Swell. Further afield, in La Romana, you can find Pete Dye’s ‘The Teeth of the Dog’ a world-famous links course. Perhaps combine a round there with a visit to the Zona Colonial for the night?
SO MUCH TO DO, SO LITTLE TIME TO DO IT!
We hope that with this information on your ideal family vacation, you can see the Dominican Republic really does have it all to offer. We haven’t even mentioned so far some of the other activities people love to do here, like mountain biking, sailing, windsurfing, trail biking, go-karting (yes there’s a really fun go-kart place with 3 different tracks, only 20 minutes from Swell).
We also have a delightful Ocean World at Puerto Plata where you can actually swim through tanks with some amazing fish, watch a hilarious sea lion show and swim with dolphins. Our own mini-mountain, Isabel de Torres with a cable car and a botanical garden at the top, watches down on it all.
IS YOUR FAMILY UP FOR AN ADVENTURE HOLIDAY?
The only problem you may face with your family vacation to Swell is trying to fit everything in: We’d love to show you our beautiful, unspoiled Caribbean playground; please do send us a message and we will help you organize your ideal, active family summer holiday.
We hope to welcome you and your family to Swell for a unique active family summer holiday
We all know that surfing is difficult. Everything about learning to surf, from paddling out to catching a wave, presents us with new and seemingly insurmountable challenges. But something about the feeling we experience when we caught our first wave profoundly resonated with us. It hooked us and transformed us from seemingly normal people into addicts. Plain and simple. There’s no turning back. No matter how many wipeouts, hold downs, or frustrating experiences we have in the water, we will persist. Thankfully, there are a few steps we can take, as beginner surfers, to remedy some of our downfalls. Dive in and learn the common mistakes surfers make while learning, and the steps you can take to fix them.
Common surf mistakes
1. Poor positioning on the board
While paddling for a wave, it’s vital to consider your position on your board. Too far back, and you’ll never catch a wave. Each oncoming roller will simply sweep under you. Too far forward, and you’ll submerge the nose of the board and nosedive in the process. Your paddle position on the board should leave the board completely flat on the water while you paddle. Neither the nose nor the tail should rise from the water as you paddle. Once you find the sweet spot on your board, look for a reference point so that you may remember the position. My go-to is my relative position to the logo on the board.
2. Dropping to a knee during the pop-up
Now that you’re paddling effectively and catching waves, it’s time to worry about your pop-up. Pop-ups are key to securing a clean ride down the line of a wave. If your pop up is too slow, the wave will outrun you. If your pop us is off-balance, you’re sure to fall. One way many beginner surfers cope with the difficulty of the pop-up is to drop to a knee to retain their balance as they get to their feet.
This is incorrect and will lead to the formation of bad habits, which can plague your surfing and halt your progression. If you’re not agile enough to hop into your stance during your pop-up in one swift movement, do not fret. Simply place one foot after the other. As the wave begins to lift you, begin your pop up by arching your back upwards, lifting your torso off the board as you place your hands flat onto the board. Next, place your back foot flat on the board and bring your front foot up between your hands, and stand up into your stance.
3. Grabbing the surfboard rails during the pop-up
Another egregious pop-up error, that is often made by learning surfers, is to grab the rails of the board during the pop-up. Grabbing the rails may seem like a natural thing to do when the force of the wave begins to lift you, but it will undoubtedly cause you to fall. While it may be a hard habit to break, it has a simple fix. Rather than grabbing your rails during the pop-up, place them securely under your chest, flat on the board, and push up into position.
4. The “poo stance”
The dreaded poo stance is the telltale mark of a kook, and it is something that should be avoided at all cost. In addition to forcing you to out yourself as a true kook, the poop stance will hinder your ability to cleanly ride down the line and retain your balance.
By definition, the poo stance is an exaggerated squat stance where the surfer is bending at the waist, not the knees, while also pushing their backside out. The remedy to the god-forsaken poo stance is to practice the correct stance repeatedly on land before trying it in the water. A correct surf stance will have the surfer’s feet just wider than shoulder-width, the torso turned facing down the line, and the knees slightly bent with the back knee turned slightly inward.
5. Standing too far forward/ back on the board
If you’ve conquered the pop-up, but can’t seem to successfully ride a wave, your positioning on your board may be to blame. If you stand too far to the front of your board, you will sink the nose, which will cause you to wipe out. If you’re too far back, the wave will roll under you and you will not be able to complete the ride. The simple solution is to pop up in the middle of your board, with sufficient weight on your front foot, allowing you to drop into the face of the wave. As you ride down the line, you may need to change your position on the board. Maneuver forward to speed up and ride further down the line, maneuver backward to avoid nose-diving, or to slow down and reenter the pocket of the wave.
6. Not facing down the line while riding backside
If you’ve mastered the pop-up, paddling, and catching waves on your own, then it is time to work on riding open faced waves. Catching your first wave is a surreal rush that is hard to match but riding your first green wave takes it to a whole new level. Taking off on a perfect peeling wave, carving up and down its open face while outrunning the white water behind you, is akin to what I imagine flying feels like. Many surfers, however, struggle with riding open-faced waves on their backside. The obvious reason for this is that when you are riding backside, you are not facing the wave, and therefore it is harder to surf as effectively.
Fortunately, there is a sure-fire method to help surfers turn and face, and subsequently ride, down the line on their backside. This method is commonly referred to as “Waiter’s Hands.” “Waiter’s Hands” is a position in which a surfer holds both hands directly in front of their torso as if they were carrying a tray of plates.
Holding your hands in this position and turning at the hips to face down the line, will allow you to avoid cutting your ride short and effectively make it down the line.
7. Downsizing your board to quickly
In surfing, like everything else in life, it’s important to crawl before you walk, walk before you run, and so on. Many surfers feel that once they’re up and riding on a foam board or a longboard that they are ready to hop on a shortboard. In reality, that is rarely the case. If you downsize your board too quickly, you’ll find executing the skills you’ve previously grasped to beß difficult and frustrating. Surfers should spend ample time on a longboard before they consider riding anything else.
Longboards teach surfers the feel of the wave, how to use the wave to generate speed, and help them gain confidence in the water. If, after a few weeks of comfortably and confidently surfing a longboard, you feel it is time to change it up, pick up a fun-size board. Perhaps a 7-footer.
Spend as much time mastering that board, as you did the longboard, and move down from there. Repeat with each size, until you arrive at a high-performance shortboard.
More information on choosing the right beginner surfboard is on this article: best beginner surfboards to buy
We hope you like the article about common surf mistakes and how to fix them
Once a minute fishing village on the Dominican Republic’s northern shores, Cabarete now stands as the extreme sports capital of the island, if not the whole Caribbean. While Cabarete is home to some of the Dominican’s most pristine beaches, it is much more than just a scenic destination from which to take in coastal views. When most travelers think of the DR, they conjure images of massive all-inclusive resorts that stick out from the coastline like an unwanted growth. Cabarete does not fit this mold.
While Cabarete is not lacking in lodging options, there is wild and untamed land to explore, isolated beaches to stroll, and of course waves to surf. Keep reading to learn 10 reasons why you need to make Cabarete, Dominican Republic your next travel destination.
1. It’s superb for beginner surfers wanting to learn to surf.
Learning to surf is tough, and if you’re not on beginner-friendly waves, it can be near impossible to progress. Fortunately for beginner surfers, Cabarete is full of fun and forgiving waves that will have you up and riding in no time. Playa Encuentro, where our boutique surf resort is located, is home to a variety of surf breaks suitable for all levels. Beginner surfers will find a picturesque beach break with a friendly sand bottom, perfect for learning.
Our surf school spends the majority of their time at Bobos, a perfect learning wave. In addition to surfing in model learning conditions at Playa Encuentro, guests at Swell Surf Camp will have the opportunity to learn from the best surf instructors on the island and participate in surf theory classes.
2. There are serious surf breaks for advanced surfers
In addition to beginner-friendly breaks, Playa Encuentro is home to some serious reef breaks that attract intermediate and advanced surfers from all over the world. Destroyers, a racing, and hollow reef break is ideal for bodyboarders and expert only surfers who are looking for doggy door exit barrels. “The left” is exactly what it sounds like, a solid left-hand reef break that turns on during winter months and provides long, clean rides.
The main peak at Encuentro has a fun left and right-hander for intermediate and advanced surfers. Coco Pipe, right next to Bobos, is a fast-breaking shallow reef break for experts only. There are even a few offshore reefs that can turn on during the right swell. So, regardless of your level of expertise, Playa Encuentro has a surf break for you.
3. You can learn to Kitesurf
While the morning in Playa Encuentro and throughout Cabarete’s coastline is perfect for surfing, the afternoons are idyllic for kiting. Cabarete’s beaches aren’t just some of the best in the country, or the Caribbean, for kiting, they rank among the best in the entire world. Kite surfers travel far and wide to get to the shores of Cabarete and showcase their talents at Kite Beach.
Fortunately for travelers looking to take up a new hobby, Cabarete is also home to some of the best kitesurf instructors in the world. Learning to kite can be dangerous, so it is important to learn from the best. Cabarete boasts a variety of kiting spots that cater to all levels. Advanced kite surfers will find the waves at the outer reefs to be a suitable challenger, while beginners will feel safe and comfortable in the calm waters of Kite Beach and La Boca.
4. It’s close to El Choco National Park
Located less than 15 minutes from the beach and the center of Cabarete, El Choco National Park gives travelers the opportunity for an unparalleled wilderness adventure. With hiking and mountain bike trails, glistening freshwater lagoons, and a labyrinth of caves to explore, El Choco National Park is a paradise for those seeking adventure. The park is home to a diverse array of species, including over 30 species of birds, lizards, and bats. Explore the park solo, or with a bilingual guide.
5. The local nightlife
Cabarete shines just as brightly during the night as its sun-soaked shores do during the day. A plethora of small, beach bars and night clubs line the waterfront and offer cocktails, live music, and all the fun a traveler could ask for. If you’re looking for a high-end night, head to Ocean World Marina to visit the variety of restaurants and entertainment options, including a casino. Start your night off with sunset drinks under the shady, palm tree adjacent bars on Cabarete beach and see where the night takes you.
6. Horseback riding along the beach has never been more fun
In Cabarete, horseback riding on the beach is taken to a whole new level at the pristine Sea Horse Ranch Equestrian Center. Go for trail rides through the jungle, explore the coastline on horseback, or even take lessons. The center offers tours on over 7-miles of trails and beaches. Advanced riders can even take lessons in jumping and other advanced equestrian activities.
7. The DR’s world-class snorkeling & diving
Situated on the northern shores of the Dominican Republic, Cabarete is ideally position for snorkeling and diving expeditions into the enchanting Caribbean Sea. Just a stone’s throw from Cabarete is the town of Sousa, where many dive and snorkeling tours operate. If you’re a first-time diver, fret not, there are plenty of programs that will get you PADI certified in just a few classes. For more advanced divers, or those looking to snorkel, many companies offer full-day or half-day expeditions.
8. It’s within reach of secluded beaches
Playa Caleton, a calm watered, crescent-shaped, secluded beach is the perfect getaway for travelers looking for a little extra relaxation. The isolated shores of Playa Caleton are surrounded by lush vegetation and rocky outcrops, many of which are carved into unique sculptures. Take a dip in the emerald green water or relax on the sandy shores, either way, you’re sure to fall in love with Playa Caleton.
9. Cabarete’s unique local food scene
While Cabarete is small compared to many travel destinations in the Dominican, its food scene is both authentic and diverse making it perfect for food-loving travelers. In Cabarete, travelers will find a diverse food scene with options from all over the world. In the mood for Mexican? Head to Gordito’s Fresh Mex, a local favorite with plans to expand all over the DR. Want something a bit more authentic?
Wilson’s at La Boca is a BBQ beach shack that serves up freshly grilled fish among other favorites. Cabarete Coffee Company serves up breakfast favorites, smoothies, and of course excellent coffee. Cabarete beach is also a hub for fine dining. Enjoy fresh seafood or steaks cooked to perfection at La Casita de Papi’s Seafood.
10. The many adventure opportunities
Cabarete may be the watersport capital of the Caribbean, but there are endless opportunities for adventure inland as well. One of the most popular activities amongst Swell Surf Camp guests—other than surfing— is canyoning through Cabarete’s nearby waterfall system.
This adrenaline-filled adventure will have you jumping off waterfalls, swimming through gorges, and exploring caves. Another popular activity among travelers in Cabarete is ziplining at Laguna Dudu. The zipline at Laguna Dudu is not your average zip line, it sends you soaring above the lagoon from the nearby cliffs before you plunge into the picturesque water.
START SURFING TODAY!
As well as the physical and psychological benefits of surfing and the way it allows for a healthy lifestyle, you can also meet new people and forget about the stresses of life for a couple of hours. To finish our guide, we want to provide a few considerations before booking your first surf lesson!
Your height and weight aren’t important because there are various shapes and sizes of boards.
Don’t worry about your fitness levels right now because your stamina will improve over time.
Surfboards can even be custom-made, if necessary.
You should NEVER feel as though you’re too old to start surfing.
Don’t live life according to other people’s expectations or rules, make your own rules (perhaps not on the road, but you get the idea!). If you feel you’ll enjoy surfing and you like the sound of the many benefits we’ve discussed here today, we have three words for you; GO FOR IT!
ABOUT SWELL
Teaching people the sport of surfing in a safe, quick and fun way is what we specialise in at Swell Surf Camp. We have taught 1000’s of people the basics of surfing.
Age? Well the average age of a Swell client is 37, which roughly means for every 20 year old we teach the sport of surfing, we also teach a 54 year old. We have taught people well in their 60’s the sport of surfing
Learn to surf in the Caribbean with us
Interested in changing your life to see the health benefits of learning to surf?
Whether you’re learning how to surf, or you’ve been doing it all your life, if you are not currently riding a longboard, or you don’t have a longboard in your quiver then you are missing out. Not only is longboarding tool to learn how to surf Longboarding is the original form of surfing, and there is nothing as stylish, graceful, and in tune with a wave as a skilled longboarder. Surfers started to stray from longboarding with the radical advancements in board shaping that occurred during the seventies and eighties. New surfers were no longer interested in surfing a longboard and doing hanging tens or cheater fives, rather than opt for the endless style of longboarding surfers turned to twin fins and eventually thrusters.
Shortboards brought about new, progressive manoeuvres that ultimately advanced surfing to new heights. But there is something to be said about tradition and going back to the roots of surfing. Longboarding has a lot to offer every surfer, not just beginners. If you’re a surfer who has never truly put in the hours on a longboard, then do yourself a favour and truly learn how to longboard. The results will be evident in your surfing, no matter what you have underfoot.
1. LONGBOARDS ARE PERFECT FOR PEOPLE LEARNING TO SURF
Every surfer should start out on a longboard. Learning how to surf can be a frustrating process, and that frustration is only compounded when trying to learn on the wrong board. A longboard provides beginner surfers with ample surface area that will catch waves with ease and feel stable on the takeoff. Surfers who learn on shortboards or try to jump down in board length too quickly will develop bad habits such as popping up with a dropped knee.
Additionally, learning to manoeuvre and generate speed on a longboard increases a surfer’s understanding of wave mechanics. Learning to walk the board allows surfers to explore the waves face and learn which sections contain speed.
2. INCREASE YOUR DAYS IN THE WATER
Longboards are wave catching machines, plain and simple. The surf does not need to be pumping for a surfer of any level to have a good session on a longboard. The harsh reality of surfing is that waves are rarely perfect.
Your local break might be “world-class” with the right swell and wind direction, but how often does that happen? Even if you know how to surf, and you consider yourself an advanced surfer, a longboard will increase your days in the water. It may as well be law that a day surfing small waves on a longboard is better than a day of not surfing at all.
3. IMPROVE YOUR SURFING
To learn to longboard is to learn how to surf. No one starts out on a shortboard, at least they shouldn’t. It is common practice for beginners to start on soft tops or longboards, and gradually reduce the length of their board as they progress. Longboards, however, are not just for beginners. While it is widely believed that longboards are for novice surfers, longboards actually serve as an invaluable progression tool for all levels of surfers.
When you longboard, things slow down, allowing surfers to deeply study the form and shape of the wave. Each longboarding session turns into a lesson in wave mechanics.
4. LEARN TO NOSE RIDE
Surfing a Longboard
Nose riding was once seen as the pinnacle of progressive surfing. In the 1960s, longboards were the standard surf craft, board shorts featured 3-inch inseams, and nothing was cooler than being able to ride with your toes hanging off the noise of your board.
To be able to hang ten or perform a cheater five, takes skill, balance, and a deep understanding of wave mechanics. I don’t know a single surfer who can noise ride, who doesn’t also rip on a shortboard.
5. IMPROVE YOUR STYLE
Watching a skilled surfer on a longboard is akin to watching ballet. Riding a longboard well is essentially an intricate dance that requires grace, balance, strength, and a great deal of skill. Style and grace may seem to come naturally to some surfers, but in actuality, they are born out of repetition and deep study.
Learning to longboard will inevitably increase a surfer’s skill and style.
6. LONGER RIDES
Along with more days in the water and an increased wave count, surfing a longboard will also provide lengthier rides. The high volume and length that allow longboards to be able to catch more waves than smaller surfboards, will also increase the length of each ride. Longboards have so much volume that they can cruise through the slow sections of a wave that will typically end a short boarders ride. Additionally, longboarders can easily ride through the ankle-high white water after a wave closes out and reach the reform.
Once you learn to longboard, don’t be surprised if many of your rides take you all the way to the beach.
Surfing Longboard
7. YOU’RE NEVER TOO OLD TO SURF A LONGBOARD
The high volume and length of longboards make them incredibly easy to paddle and manoeuvre, therefore longboards are an ideal surf vessel for those of us who are a bit over the hill age-wise. If your shoulders can’t handle the wear and tear of paddling a board that may be shorter than you and sinks halfway into the water with you on it, then it may be time to learn how to longboard. If your hips cannot perform the jerky movements it takes to pump down the line on a shortboard, then it may be time to learn to longboard.
And if you do not have the strength to submerge your board underwater to duck dive, then it may be time to learn how to longboard.
8. NEVER GET SKUNKED ON A SURF TRIP
The seventh circle of hell most likely involves a perpetual cycle of booking a surf trip to some far-flung tropical surf paradise, only to arrive to find that there is no trace of a swell. No one likes getting skunked, but if the waves are small wouldn’t you still want the ability to surf? That’s where a trusty longboard comes in handy.
You may not get spit out of stand-up barrels, but at least you can catch a few waves on a trip where things don’t exactly go as planned.
9. CRUISY AND RELAXING RIDES
Whether you’re just learning how to surf or you’ve been at it for twenty years, you’ll love the laid back, cruisy rides that longboards offer. There’s no need to tire yourself out paddling, just a few hard strokes will put you into virtually any catchable wave. There is no need to take off late and drop in on a steep pitching face, longboards will have you into a wave and on your feet early.
And there’s no need to wear yourself out by tirelessly pumping to get down the line, simply cruise and enjoy the ride.
In conclusion, if you know how to surf, great hop on a longboard. If you don’t know how to surf, no problem at all hop on a longboard and learn. If you’re on the world tour or you’re just an average beach bum, hop on a longboard and you’re guaranteed to have a blast in the water.
LONGBOARDING SURF VIDEO
ABOUT SWELL
Teaching people the sport of surfing in a safe, quick and fun way is what we specialise in at Swell Surf Camp. We have taught 1000’s of people the basics of surfing.
Age? Well the average age of a Swell client is 37, which roughly means for every 20 year-old we teach the sport of surfing, we also teach a 54-year-old. We have taught people well in their 60’s the sport of surfing
Learn to surf in the Caribbean with us
Interested in changing your life to see the health benefits of learning to surf?
Have you ever done research while looking for a new surfboard? If so, then you’ll know that there is an overwhelming amount of information on there on making the right choice.
THE SURFBOARD FIN
Fins for your board are no different. They are available in a variety of sizes, materials, setups, and flexibility. And whether you’re a beginner or pro, your fin setup will have a huge impact on your style and preference when surfing. Now, before going any further let’s discuss what fins actually do. They essentially give you control, direction, and stability on your board. Without fins, you take away much of your ability to navigate through waves. Surfing with precision and speed is really only possible with fins. As we said before, there are many different options out there for fin setups. Here’s are the most popular fin set ups used
DIFFERENT SURFBOARD FIN SETUPS
SURFBOARD FINS
The number of fins and possible configurations will vary from board to board and depend on fin type. You’ll have to decide which setup will be best for you and go from there. We will discuss some of the most popular configurations to give you a better idea. Each one is used for a different reason and is chosen by different types of riders.
SINGLE FINS
The single fin option is ideal for longboards. Some surfers consider these a touch outdated, while others appreciate the different feel it offers. These fins are really best for basic, straight shot surfing. Basically, they won’t help you while doing anything too fancy.
They are long, wide and big offering fairly easy control over the board. Single fins are best when surfing small/medium, fat and weak waves. Since one fin creates less drag than multiple fins, they are most useful when surfing smooth, slow turns.
That being said, if you try and make quick turns or moves, a single fin won’t handle it as well as a multiple fin setup.
TWIN FIN
A two fin setup is referred to as twin fins or a dual fin configuration. You will typically see a twin fin setup on a shorter surfboard. They can offer more fun, playful surfing when used.
Twin fins give the rider more manoeuvrability and have a skatier feel than a single fin. This fin setup saw a spike in popularity in the 1970s and 1980s.
Surfer Mark Richards used twin-fin “fishes” to win four consecutive World Championships. After that, surfers worldwide saw the competitive edge that two fins can offer a rider versus a single fin. A dual fin setup offers more control and speed than a single fin, but can also feel a little loose and make bottom turns harder.
THRUSTER FIN/TRI FIN
As you might have guessed this set up is three fins. The tri-fin set up is by far the most popular amongst surfers across the board.
It can be ideal for all skill levels from novice to expert. It’s also the most practical purchase. If you have a tri-fin setup you can always remove fins to try single and twin fin surfing as well. The third fin adds more stability and manoeuvrability.
The two outer fins are angled towards the centre of the board increasing tracking and speed. The middle fin is closer to the tail of the board. The tri-fin setup came from Australian surfer Simon Anderson. He came up with the idea of three equal-sized fins in the 1980s.
The setup exploded in popularity after that. The tri fins do well even in harsher conditions. They can hold up to steep, powerful waves. This setup is great for high-performance riding and tricks. The only real downfall is the drag you get from the additional fin.
QUAD FIN
Quad fin
The quad fin is, can you guess it? That’s right, 4 fins! This setup can offer you some of the best features of the twin fin and the thruster.
Opposed to Thrusters, Quads can offer much more control and are best used in small surf. When the back fins are positioned close to the rails they help increase speed for the rider.
They also allow for fast turns, similar to a dual fin, however, with a quad, the surfer maintains more control. The quad fin can stand up to powerful waves and not falter. Because this setup doesn’t have a centre fin, there is less drag. This yields maximum speed but doesn’t sacrifice manoeuvrability. The quad setup will take a bit of getting used to. The first time you ride, it may feel a little loose.
5-FIN SURFBOARD SETUP
5 Fin
Although it may sound like a 5-fin setup means you attach 5 fins to your board, this is not the case.
Five fin configurations are not supposed to be surfed with all five fins. Five fin boxes simply give you the option to mix and match fins.
Different types of setups using the various 5 boxes are used depending on your preference and the surf conditions you encounter. Basically, the more boxes your board has, the more fin options you have. You can experience more fin setups with the same board. Not many people ride with the 5 fin setup, most people either prefer 3 fin or 5 fin setup.
2+1 FIN
2+1 Fin
This is a 3 fin configuration, similar to a thruster/tri-fin setup. The difference here: the middle fin is a longboard single fin. The remaining 2 fins are regular thruster side fins on each side. The middlebox is longer with a 2+1 setup.
This gives you the choice to attach the middle fin more towards the front or back. This setup is gaining popularity with riders who use funboards, eggs, logs and SUPs.
FIN TYPE
Now that we have a general idea of fin setups, let’s dive into fin type. We are going to look at glassed-in fins vs. swappable (removable) fins. It is important to know the differences between the two and what each is used for.
GLASSED-IN
The biggest aspect of glassed-in fins is that they are not interchangeable. They are permanently attached to your board. These fins are usually very smooth and offer a nice ride. However, because they can’t be taken on and off, they limit your versatility. This also poses expensive repairs when the fins get damaged.
SWAPPABLE (REMOVABLE)
Removable fins offer lots of versatility because you can take them on and off. These types of fins are screwed into your surfboard via “boxes”. Swappable fins are taken on and off using what’s called a fin key. The key adjusts the small screws and is very simple to do. Different types of fins are used in the corresponding type of boxes. Don’t force a fin into the wrong type of box and make sure the fin is being attached the right way. Once the fins are attached to the correct box in the correct position, you simply tighten the screws. It’s really that simple. If you decide removable fins are the right fit for you, there are a few things to know about the boxes used to attach the fins to your board. There are a few different types to choose from.
BOX TYPES & COMPATIBILITY
The only surfboard that is widely compatible with many different fin boxes are longboards. Most all other surfboard styles are a little more specific with what’s required. These boards will generally be equipped with one of three different box types.
DUAL TAB (FCS AND FCS II) FIN BOXES FCS
(Fin Control System) came out in the 1990s and has since been the most popular fin system used by surfers worldwide. The FCS fins are attached by two tabs or plugs that are screwed into the board. FCS recently released the FCS II keyless Fin Standard. This option does not require screws or a fin key to attach and remove the fins. FCS II is also backwards compatible. This means you can use your older FCS fins with the new FCS II system. All that’s required is a compatibility kit.
The other common type of fin box is a single tab (futures). The single tab fin box connects to the entire length of the of the fin box (unlike boxes with plugs). This box type offers a strong, lightweight connection to the surfboard. These boxes are also attached with screws. More info: Future fins (opens a new window) Different Aspects Of Your Fins To Keep In Mind FIN SIZE Bigger fins will offer a tighter feel. More of the board’s surface is in direct contact with the water. On the other hand, small fins will offer a looser feel. Of course, it gets a touch more technical than that, as there’s a lot more to it.
FIN FLEXIBILITY/FLEX
As you might imagine, the flexibility of a fin will affect how your board will handle certain waves. Fins that are stiffer will respond quickly but don’t allow for much give. These fins are great for all skill levels. They are quite stable and predictable. A stiff fin works best in hollow waves. A flexible fin is best used with playful waves. They offer a much skatier feel. These fins are ideal for fast turns but are harder to control. Of course, it’s not as simple of just stiff versus flexible. Fins have flex patterns. This means that certain fins may have a stiffer base while the tip is flexier. A fin-like this can offer a rider stability while simultaneously providing agility.
FIN BASE/LENGTH
The fin base measurement refers to the part of the fin that is directly attached to the board. The longer the base, the more drive and speed you can expect. When a rider turns the surfboard, pressure is put against the base of the fin which increases their speed. If you choose a fin with a smaller base you won’t feel as much drive but you’ll see more success with quick, short moves.
FIN RAKE/SWEEP
When looking at a fin, the rake (sweep) refers to how far the fin tilts to the back. A fin with less rake will make it easier to turn fast, while a fin with more rake will help riders with longer turns. If you enjoy big, playful waves, you’ll want to opt for more rake. If you are a quick turning, fast rider, you may choose less rake.
TOE/SPLAY
The toe (splay) refers to the angle of the fins on the side in comparison the fin in the middle. Side fins are usually described as toed-in. This means the front of the fin is angled towards the middle of the board. This angle allows water pressure to build on the outside of the fins and helps the rider with responsiveness. FOIL The term foil refers to the curve and shape of outer and inner sides of the fin. The thinnest part will be near the tip and thicker part near the fin’s base.
Different types of foil will alter the way water flows over the surface of your fin. This will, of course affect the way your fins and board perform. Your middle fins will always be symmetrical and convex on both the inner and outer sides. This is sometimes called 50/50, signaling even stability and water distribution. Your outside fins will typically be convex on the outer side and flat or curved on the inner side.
A flat inside will give the rider more balance and control as well as speed. A concave or curved inside will offer less drag which helps build speed and gives more fluidity.
HEIGHT/DEPTH
The height, sometimes called the depth, is the measurement from the fin base to the very tip. This feature can affect how stable your board feels through turns. Typically, the taller the fin, the more forgiving and easier it is to handle. For more advanced riders who will be doing quicker, more trick turns, shorter fins offer a smoother ride.
CANT
The degree that your fins tilt in regards to the surfboard’s base is called the cant. When the angle of the fin to the board is completely straight up and down, it’s at 90 degrees; this means it has a 90 degree cant. A 90 degree cant is also called “no cant” because it has no angle. When you have a 90 degree cant, you will usually ride faster. Any angling that is greater than 90 degrees will give you better response. Surfers will cant their fins to help feel more control of the board and increase responsiveness. Canted fins are especially helpful through turns. Fins with no cant will give you speed, but offer less playfulness. When you give your fins a little cant they’ll allow for more maneuverability and a looser feel.
VIDEO EXPLAINING DIFFERENT SURFBOARD FIN SET UPS
ULTIMATELY
When learning about fins, it can be a lot to take in. There are so many different choices and aspects to consider. The best advice we can offer is to try different combinations until you find what feels best for you personally. Think of it as test driving a car. Test out different fin types and setups to get a sense of how each feels for you. QUICK-REFERENCE TIPS:
For a playful setup, add small fins with a little flex and sweep to a stiff surfboard
For a faster ride with more drive, add stiff, big fins with a lot of sweep to a soft board •The terms cluster and placement of the fins mean how close together or far apart they are on the surfboard
The more spread out a fin cluster is, the more control the rider will have; the closer together a cluster is, the more speed and response the rider will feel
Where you place your fins in relation to the tail of your surfboard will change how it feels. Fins attached more towards the front will feel looser. While fins more towards the back will give the surfer a more controlled feel
Wide-tailed boards are usually best paired with bigger fins
Surfers who prefer shortboards and ride bigger waves will benefit most from fins with more rake We hope you enjoyed this article and learned a little bit about the world of surfboard fins. Happy riding!
SURFBOARD FINS QUESTIONS
## Beginner Questions
**Q: How do I know what size fins to use on my surfboard?**
A: Fin size depends on your weight, surfing style, and wave conditions. As a general rule, heavier surfers need larger fins for better control and drive. Most fin manufacturers provide size charts based on rider weight. Start with medium-sized fins if you’re unsure, as they offer a good balance of control and maneuverability.
**Q: Can I mix different brands of fins on my surfboard?**
A: Yes, you can mix fin brands as long as they’re compatible with your fin box system (FCS, FCS II, or Futures). However, it’s generally recommended to use fins from the same set to maintain consistent performance and balance.
**Q: What’s the difference between fiberglass and plastic fins?**
A: Fiberglass fins are stiffer, more responsive, and offer better performance but are more expensive and can break on impact. Plastic fins are cheaper, more flexible, and nearly unbreakable, making them ideal for beginners or rocky surf spots, but they provide less drive and precision.
## Technical Surfboard Fins Questions
**Q: What does “fin template” mean?**
A: Fin template refers to the overall shape and outline of the fin when viewed from the side. Different templates (like dolphin, pivot, or rake) are designed for specific surfing styles and wave conditions. More upright templates are better for quick turns, while swept-back templates excel in powerful waves.
**Q: How tight should I screw my fins in?**
A: Fins should be snug but not over-tightened. You should be able to remove them with reasonable effort using a fin key. Over-tightening can strip the screws or crack the fin box. If your fins feel loose during surfing, gradually tighten them until they feel secure.
**Q: What are honeycomb fins and when should I use them?**
A: Honeycomb fins have a lightweight honeycomb core with fiberglass layers. They offer a good balance of performance and durability while being lighter than solid fiberglass fins. They’re excellent for intermediate surfers who want performance fins without the brittleness of pure fiberglass.
## Performance and Setup Questions
**Q: Should I use the same fin setup in small waves versus big waves?**
A: Generally, no. In small, weak waves, you might want smaller, more flexible fins or even try a twin-fin setup for more speed and flow. In larger, more powerful waves, you’ll typically want larger, stiffer fins with more rake for better hold and control.
**Q: What’s the difference between FCS I and FCS II systems?**
A: FCS II features a keyless system where fins click in and can be removed by hand, while FCS I requires screws and a fin key. FCS II also provides a stronger connection over a larger surface area. FCS II boxes are backward compatible with FCS I fins using an adapter kit.
## Maintenance and Care Questions
**Q: How do I know when my fins need replacing?**
A: Replace fins when you notice significant chips, cracks, or worn edges that affect water flow. Bent fins, loose connections, or damaged fin boxes also indicate it’s time for replacement. Regular inspection after surf sessions helps catch damage early.
**Q: Can I repair a cracked fin?**
A: Minor chips and small cracks in fiberglass fins can sometimes be repaired with marine epoxy or fiberglass repair kits. However, major cracks or damage to the base compromise the fin’s integrity and performance. Plastic fins are generally not repairable.
**Q: How do I clean my fins?**
A: Rinse fins with fresh water after each session to remove salt and sand. For deeper cleaning, use mild soap and a soft brush to remove wax buildup or algae. Avoid harsh chemicals that could damage the fin material or finish.
## Advanced Questions
**Q: What is fin cant and how does it affect my surfing?**
A: Fin cant is the angle at which side fins tilt away from vertical. More cant (greater angle) increases responsiveness and hold during turns but creates more drag. Less cant provides more speed but reduced turning response. Most modern thruster setups use 4-7 degrees of cant.
**Q: Should I adjust my fin position based on my surfing style?**
A: Yes. Moving fins forward makes the board feel looser and more pivotal, ideal for quick turns and progressive surfing. Moving fins back increases drive and stability, better for powerful carving turns and high-performance surfing in bigger waves.
**Q: What are quad fin trailer fins and how do they work?**
A: Quad trailer fins are the smaller rear fins in a quad setup. They provide extra hold and drive while maintaining the speed benefits of not having a center fin. Trailer fins are typically smaller and more upright than the front quad fins to maintain balance.
**Q: Can I use longboard fins on a shortboard?**
A: Longboard single fins are designed for longer fin boxes and different hydrodynamics, so they won’t fit or perform well on shortboards. However, you can sometimes use shortboard fins on certain longboards if the box systems are compatible, though performance may not be optimal.
## Wave-Specific Questions
**Q: What fin setup is best for beach breaks versus reef breaks?**
A: Beach breaks often benefit from more forgiving setups like medium-flex fins or even smaller fins for quick adjustments to changing conditions. Reef breaks typically require stiffer, larger fins with more hold for the more consistent, powerful waves.
In need of good waves?
At Swell we provide Learn how to surf holidays for people that have never surfed before as welll as a great social place to stay for advanced and expert surfers looking for a cool, comfortable & social place to stay. We offer full packages which include:
Airport transfers
Breakfast and 4 dinners
Comfortable & stylish accommodation
surfboard rentals and surf transport
A great social vibe
ABOUT SWELL SURF CAMP
Located on the scenic north coast of the Dominican Republic is our purpose-built surf resort We cater for surfers of all levels, from beginners to expert surfers who are looking for an active surf holiday Swell offers full surf packages holidays
Surfboard shaping and design have both changed significantly over the last few decades. Shaping trends are constantly changing. In the seventies, the twin-fin fish began to dominate line ups. Surfers were completely enthralled by the newfound speed and maneuverability of a shorter board. In the eighties, the thruster was designed and changed performance surfing forever. In the nineties and into the new millennium, high-performance boards were long, thin, and completely rockered out for maximum maneuverability. Today, high-performance boards are getting shorter and fatter with an increased focus on the volume under the chest. But what do all these design features really do? How does a board with low entry rocker compare to one with plenty of rocker when you’re actually surfing? What’s the difference in feel between a single fin, a twin fin, a thruster, and a quad? If you’ve ever wanted to know the ins and outs of surfboard design, you are in the right place. From design to function, this article explores all the intricacies of board design
SURFBOARD LENGTH
Length is a pretty intuitive design feature. The length is the measure of the surfboard from the tip of the nose to the tail. But there is more to length than one might think. Just a few inches taken or added to a board will create a noticeably different ride. The basic school of thought when it comes to length is that the more length a board has, the easier it will be to catch waves. Surfers may ride longboards on small days, or when the surf is maxing out, they may opt for larger step-ups and even big wave guns for help paddling into waves that would be otherwise too large and too fast to catch.
SURFBOARD WIDTH
Width is the measurement of a surfboard across the board at its widest point. Width plays a role in a few different aspects of surfing. The more surface area a board has, the more it will float, the easier it is to paddle, and the easier it is to catch waves. One way shapers achieve this increased surface area without adding length to a board is by increasing width. Small wave grovelers often feature wide tails; this allows surfers to catch more waves. A board with a wide nose might do well in small surf, but it struggles in large surf with steep faces because a narrow nose allows for a steep drop.
TAIL
The tail is the back end of the surfboard. Its shape and thickness directly affect the performance of the board on a wave. The shape of the tail either allows the board to maintain hold on a wave’s face through a turn or release quickly. For example, a rounded tail can hold, but a tail with a wing feature or a swallow tail releases the board from the waves face.
SURFBOARD RAILS
Rails are the edges of the board. Rails affect boards speed, planning ability, and tube riding ability. Thick rails, for example, will plane well and allow for a lot of speed. A hard, low rail has plenty of hold to the waves face, perfect for a good tube riding.
ROCKER
Rocker is a term that refers to the curvature of the board. A dramatic, heavy, or steep rocker will be more curved, while a flat rocker will be less curved. A steep rocker at the nose of the board allows the surfer to take steep drops. Contrastingly, a board that has a steep tail rocker or a steep rocker for the length of the board allows the surfer more manoeuvrability because the board has fewer contact points on a wave and therefore, less drag. High-performance boards often have intricate rockers that allow surfers to perform in steep, dynamic surf. Small wave boards often have flat rockers allowing the board to plane and maintain speed through slow sections of the wave.
BOTTOM CONTOURS
Often overlooked, but crucial factor that plays a significant role in the performance of a surfboard is the bottom contour.
These seemingly minor variations on the underside of the surfboard significantly impact how the board interacts with the water, affecting the ride’s speed, stability, and manoeuvrability.
The concept revolves around hydrodynamics, the branch of physics concerned with the force exerted by or on liquids in motion.
SURFBOARD VOLUME
Importance of Correct Surfboard Volume
Selecting the appropriate surfboard volume is essential for maximizing performance and manoeuvrability in the water. The right volume not only improves your surfing experience but also guarantees suitability for various wave conditions, enabling you to handle different types of waves effortlessly.
Moreover, comprehending the significance of the appropriate surfboard volume customized to your weight, experience level, and surf conditions is fundamental for a successful and enjoyable surfing session.
Impact on performance
The size of a surfboard significantly impacts its functionality in water. High-volume boards, excellent for gaining speed and catching waves with ease, often limit swiftness and make sharp turns difficult.
They are suitable for beginners or those surfing smaller, less forceful waves. Conversely, seasoned surfers frequently favour low-volume boards for handling large waves or performing exact manoeuvres.
These boards provide superior control and permit steeper drop-ins but necessitate more expertise to paddle and catch waves.
Concrete data from tracking devices installed in surfboards provide clarity: there is an optimal balance between size and performance adjusted to each surfer’s weight, skill level, and the wave conditions they aim to master.
Insufficient size leads to sinking, making even the starting difficult; excess can leave a surfer grappling with a board that feels cumbersome and hard to control. Whether opting for longboards that effortlessly slide across small swells or shortboards for rapid turns on large wave days, choosing the correct size is crucial for any surfer wishing to optimize their time in the water.
Suitability for different wave conditions
Choosing the right surfboard volume greatly depends on the wave conditions you’ll be surfing in. For smaller waves, opt for boards with more litres to increase speed and glide. This bit of extra volume helps maintain momentum when the power from the ocean isn’t as strong.
On large days, however, surfers should switch to boards with less volume. These sleeker designs provide greater manoeuvrability, allowing for sharp turns and snap on powerful waves without losing control.
In extreme conditions like XXL waves, which require both paddle power and stability, selecting a board with a higher volume becomes essential again. Adjusting your board’s volume according to these guidelines can transform your surfing experience.
Adding roughly 3 liters to your board’s volume can make all the difference in small-wave performance by helping catch more waves easier; whereas reducing volume enhances handling in heavy swells.
How to Calculate Your Ideal Surfboard Volume
When determining your ideal surfboard volume, take into account your weight, experience level, and the wave conditions you’ll be surfing in. These elements are essential in finding the appropriate volume that will optimize your performance and enjoyment on the waves. Utilize online volume calculators to gain thorough understanding of the particular needs for various types of surfboards customized to suit you.
Factors like weight, experience level, and surf conditions
Assessing your optimal surfboard volume begins with comprehension of three vital factors: weight, skill level, and the wave conditions you aim to tackle. These components aid in deciding not just about your comfort and steadiness on the water, but also enhance your competence and advancement as a surfer.
Weight: More weighty surfers need surfboards with a greater volume to keep afloat. For instance, novices can start looking for boards where the volume is equal to 100% of their body weight in kilograms. As you advance to an expert rank, this requirement modifies to a board volume that extends from 30-40% of your body weight. Such a calculated activity certifies that the board backs you sufficiently without affecting maneuverability.
Experience Level: Your skills largely impact the volume of surfboard you require. Novices gain from extra volume as it provides increased steadiness and simpler wave catching. Typically, their boards have volumes similar to their complete body weight in liters to simplify paddling into waves and making standing up more achievable. Conversely, adept surfers can manage boards with a lesser volume—around 30-40% of their body weight in liters—permitting for sharper turns and superior control in high-performance surfing situations.
Surf Conditions: The magnitude and force of the waves you aim to tackle are defining factors in selecting the suitable surfboard volume. Boards that are larger with higher volumes are recommended for smaller or weaker waves as they simplify catching such waves earlier. On the other hand, substantial wave conditions suggest a reduction in volume for desirable speed control and manoeuvrability. This adapted strategy lets surfers optimize their experience based on wave conditions, assuring they have the right equipment for both relaxed cruises on small swells and challenging rides on colossal waves.
By meticulously considering these three aspects – weight, skill level, and wave conditions – you prepare yourself for triumph on the water. Whether opting for a funboard for its lenient nature or accepting big wave guns for exciting rides, understanding how each component impacts your surfboard’s performance is vital to your growth as a surfer.
Examples of Volume Calculations
Calculating the ideal volume for your surfboard is crucial for optimal performance in various wave conditions. Consider factors like weight, experience level, and surf conditions when determining the right size for you.
Understanding the volume requirements based on these elements can significantly enhance your surfing experience. Read our comprehensive guide to find out more about calculating your perfect surfboard volume.
Different surfboard types and their typical volume ranges
Understanding the right surfboard volume for your needs is crucial. It changes how you catch waves, your speed, and your ability to perform tricks. Here’s a quick look at various surfboard types and their typical volume ranges. This guide aims to help you make an informed choice.
Surfboard Type
Volume Range (liters)
Shortboard
22-35
Fish
25-45
Funboard
40-60
Longboard
60-100
Shortboards, known for their agility, fall within a 22-35 liters volume range. They’re best for experienced surfers who want sharp turns and control on steep waves. Fish surfboards, offering a bit more volume at 25-45 liters, cater to those looking for a balance between speed and manoeuvrability. Funboards, with their 40-60 liters volume, suit beginners well, offering ease of catching waves and stability. Longboards have the highest volume, ranging from 60-100 liters, ideal for surfers who prioritize wave-catching ability and a smoother ride over sharp manoeuvres.
Each surfboard type caters to different skill levels and wave conditions. Choose wisely to enhance your surfing experience.
SURFBOARD FINS
Fins propel the board forward, dictate the turning radius, create hold on a waves face, and much more. So obviously, fin set up directly affects the board’s performance and feel. While there are a few novelty few setups that have gone in and out of fashion over the years, such as the bonzer or the asymmetrical setup, there are four standard fin setups: single fin, thruster, twin fin, and quad.
THRUSTER
The thruster (3 fins) is, perhaps, today’s most common fin set-up. When the thruster first appeared on the scene during the 1980s, most surfers were riding twin fins that offered a lot of speed, but not much manoeuvrability. The addition of the back fin provided surfers enough control to be able to turn on a dime. The thruster set-up allows surfers to change direction with ease and carve out massive turns on an open face. This increased manoeuvrability completely changed progressive surfing and brought about the power surfing style that was popularized in the ’90s.
TWIN FIN
The twin fin came into popularity during the 1970s with the rise of “the fish.” These unique shortboards, with two fins placed far apart, allowed surfers to reduce drag and increase speed. Twin fins are ideal, and a blast, in small to medium waves where they provide optimal maneuverability and flow.
QUAD
The Quad fin set up (4 fins) leans heavily on the basic science behind the twin fin, a wide space between fins for water to flow equals speed. However, the extra two fins on the quad provide additional hold, which comes in handy in smaller waves.
Twin Fin
Quads with the trailer fin closer to the rails and further up on the board, perform great on smaller waves, like a twin fin but with a bit more control.
Quads with the trailer fins further back provide extra hold in large hollow barrels, without sacrificing speed.
SINGLE FIN
Today, most single-fin surfboards are longboards, but that wasn’t always the case.
Single fins offer surfers long, drawn-out, arching turns. The one large fin offers plenty of hold but does not have the manoeuvrability of a board with three fins, regardless of the board’s length.
MORE INFO ABOUT SURFBOARDS, SHAPES AND DESIGNS:
– The Swell article surfboard shapes give you more insight into the different types of shapes. – New to surfing? Read the beginners surfboard guide. – What is needed to get you into this? Read the surf equipment and accessories page. – Don’t want to bring your surfboard to Cabarete? See our list of surfboards for rent in Cabarete
ABOUT SWELL
Teaching people the sport of surfing in a safe, quick and fun way is what we specialise in at Swell Surf Camp. We have taught 1000’s of people the basics of surfing. Learn to surf in the Caribbean with us Interested in changing your life to see the health benefits of learning to surf at our surf retreat?
Topics covered and explained in the Surf, waves, swell and break terminology:
Understanding Swell
Ground Swell
Wind Swell
Understanding Wave Formation
Concave Refraction
Convex Refraction
Understanding Surf Breaks
Beach Break
Point Break
Reef Break
Wave anatomy
The Peak
The Shoulder
The Face/ Wall
The Lip
The Channel
Different types of waves
To a non-surfer, a wave is just a wave. In actuality, waves are like fingerprints; no two are alike. The same is true for wave setups; no single break is exactly the same as another one anywhere in the world. In order to improve one’s skills, a surfer must have a firm grasp on wave mechanics and an in-depth knowledge of a variety of different types of surf breaks.
WAVE GUIDE
To understand surf breaks and wave mechanics, we must look at how waves are formed by swell and where swell comes from.
UNDERSTANDING SWELL
The sun is the origin of all surf. Solar energy creates wind, and winds blow across vast areas of open ocean to create energy that eventually organizes itself into swell.
When swell travels great distances or combines with other swells, it can increase in size and interval. There are two types of swell that cause surf, groundswell, and wind swell.
GROUND SWELL
Ground swell
Groundswell is the type of swell surfers hope and pray for; it often creates large and powerful surf.
Groundswell is created by large storm and weather systems or strong wind blowing over long distances of open ocean. Groundswell can travel for thousands of miles, and the wave energy can reach up to 1,000 feet in depth. Ground swells typically produce long interval swell and large surf once they make landfall.
WIND SWELL
Wind swell
Wind swell is created by less powerful, more localized wind systems.
The wave energy from wind swells do not run as deep, and they only travel short distances across open ocean.
The result is usually smaller surf with a shorter interval.
UNDERSTANDING WAVE FORMATION
Wave refraction
When swell finally reaches shallow water- whether that be a continental shelf, a reef system, or a sand bar- it is slowed and finally releases its energy in the form of breaking waves.
When swell bends horizontally as it breaks, it is called refraction. Refraction steers swell towards or away from shore. Some coves on the same coast during the same swell can have pumping waves while others are as calm as lakes.
This occurrence is caused by the varying ocean floor contours that cause different types of refraction. There are two types of refraction that can occur, depending on the ocean floor topography, concave refraction, and convex refraction.
CONCAVE REFRACTION
When open ocean swell comes into contact with an abrupt, protruding change in the ocean floor that is surrounded by deeper water- often a reef or sand bar- the swell will bend at its far ends as it turns into a breaking wave.
The center portion of the swell is slowed by the protrusion. The result resembles a bowl shape that travels towards the shore, with the “opening of the bowl” facing the shore.
CONVEX REFRACTION
When open ocean swell collides with a protruding headland, such as a cliff, jetty, or even a pier, the portion of swell confronting the headland slows, while the rest of the line of swell continues forward at pace.
The result closely resembles a “C” shape with the curved side moving towards the shore. This is known as convex refraction, and it nearly mirrors concave refraction in appearance.
UNDERSTANDING SURF BREAKS
Beyond refraction, ocean floor topography plays a role in determining how a wave breaks, not just how it bends. Surf breaks are categorized in three different ways: beach breaks, reef breaks, and point breaks. Understanding the differences between surf breaks is key to not only progressing as a surfer but staying safe in the water.
At Swell Surf Camp, our clients have access to a variety of surf break types that will match their surf skill level. The Dominican Republic is home to a vast system of reef and beach breaks.
BEACH BREAK
Beach break
If you’re a first-time surfer, it’s best to find a mellow beach break to learn. Beach breaks are typically the safest types of surf break. Incoming swell breaks over sand bars versus harsh rocks or reef.
The shape and size of the wave are directly influenced by the sand bars that are constantly shifting. Beach breaks typically offer a variety of peaks compared to reef or point breaks that might only have one take off zone.
POINT BREAK
Point Break
Point breaks, as the name suggests, are waves that break on a point, a protruding land mass that is perpendicular to the wave’s direction.
This point can be natural or manmade, such as a jetty. The wave at most point breaks is slow forming and offers surfers a long ride with a carve-worthy wall. Point breaks are great for surfers who are looking to progress and learn to carve / turn.
REEF BREAK
Reef break
A reef break is created by a wave breaking over a rock or coral formation under water. Reef breaks can either have submerged reef or exposed reef.
A submerged reef is a rock formation that has been covered by sand. Submerged reefs are typically safer to surf over than any other type of reef. The exposed reef is often sharp and dangerous to step on. Additionally, reef systems can have other hazards, like sea urchins.
Reef breaks do, however, offer a consistent peak and wave shape that you would not find at a beach break.
WAVE ANATOMY
In order to successfully catch and ride waves, a surfer must comprehend basic wave anatomy. Where should you take off? What parts of the wave have the most speed? Where is a safe place to wait for incoming surf? All of these questions can be answered by digging a little deeper into the anatomy of a wave.
THE PEAK
One mistake many first-time surfers make is paddling for any incoming wave no matter where they are positioned compared to the peak. The peak of a wave is its highest point and the ideal take-off point for surfers. A wave begins to break at the peak making it the steepest portion of the wave and the easiest place to take off.
THE SHOULDER
The shoulder of a wave is a flatter and more mellow section of the wave that sits down the line from the peak. The shoulder is a great place to sit and watch your friends score waves.
THE FACE/ WALL
The face or wall of a wave is the steep, vertical section of a breaking wave just in front of the “pocket.” Our goal as surfers is to ride on the face of the wave just in, or slightly in front of, the pocket. Once a surfer gets too far down the face of the wave (closer to the shoulder), they cut back so that they can ride in the pocket of the wave. Beginner surfers will find that their rides will be cut short if they ride in front of the face of the wave, rather than on it. The vertical section of the wave has the most power.
THE LIP
The lip of the wave is the cresting portion that comes down as the wave breaks. With offshore wind and a decent sized swell, surfers can pull into barrels behind the lip of the wave.
THE CHANNEL
While the channel is not technically part of the wave, it is vital to a surfer’s ability to paddle out. Paddling out can be difficult, especially in large surf. The channel is where all of the incoming surf flows back into the sea. This is the best place to paddle out, as it is often calmer than other parts of the break.
LEARNING MORE ABOUT WAVES
The most effective way to learn about waves, different surf breaks, and varying surf conditions is to surf as much and as often as possible. At Swell Surf Camp, we not only teach our clients to surf in the warm Caribbean Sea, but we provide the ultimate surf experience through stellar lodging, tasty food, and a welcoming community.
Decades have passed since surf travel has required reading nautical charts, packing weather radios, and crossing your fingers that your destination had some trace of swell. Gone are the days of surf exploration, where any hidden stretch of coastline could possess the often sought after—yet rarely found—perfect wave. Today, we open our phones and we are able see what the surfs doing anywhere in the world in a matter of seconds.
Regardless of the local of your session, surf trip or not, getting skunked burns the same. Surf and weather forecasting might be the most advanced it has ever been, but it will do no good if you’re not quite sure how to read a forecast. Can you say without a shred of doubt that you understand the relationship between swell interval and wave size? Do you know what swell directions the best for your local break?
Can you track a swell originating halfway around the world until it makes landfall on your coast? At Swell Surf Camp, we want you to prepared and knowledgeable surfers, whether you’re surfing at our Caribbean surf resort, or at your home break. Keep reading to learn how to read and interpret surf forecasts and you’ll be sure to score on your next trip down the coast or across the world.
WAVE HEIGHT
Wave height, it’s pretty self explanatory . Simply put, it is the height of the wave. Understanding the mix of variables that affect a wave’s height will improve a surfer’s ability to read a forecast, and ultimately lead to catching more waves. First, it is important to know that the forecasted wave height, and the height of a wave’s face are typically different. Waves are measured from the top of the peaking swell, which is not the same thing as the face. So, a 2-foot forecast on an offshore day, with the right ocean floor contour, can produce a 3 to 5-foot face.
The forecast might read 2-3 feet, but the waves face could easily be head high.
SWELL INTERVAL
Failure to comprehend and properly read swell interval can lead to missing a solid surf session. Swell interval is defined as the time that passes between two waves, typically measured in seconds. Swell interval has a direct relationship to wave size in that a long interval will produce larger surf.
The concept is simple. If a wave has a long interval, it has more time to build in size. Thus, along swell interval or period —as it is often called— will create bigger surf than a short interval on with the same size swell. Longer interval swell will also produce more powerfull breaking waves.
SWELL DIRECTION
Swell direction is another term with a self-explanatory title, it is simply the direction of the incoming swell. A swell’s direction is categorized by the direction the swell is traveling from, rather than the direction of that swells trajectory.
A swell traveling from south to north would be labeled as a south swell. How swell direction affects wave quality depends what direction the coast/ break is facing and the wind direction. If a beach is facing southwest and the incoming swell is a northwest swell, the resulting conditions will most likely be choppy.
The most common Swlel direction on the North Coast of the Dominican Republic is North East, but in winter time when stronger storms are off the coats of New Work it will send waves down to the North Coast of the DR in a good North Swell. A typical North Swell in The DR will be 6 foot in height with a 13+ second interval, resulting in waves overhead to double overhead in Cabarete
WIND DIRECTION
Wind direction will always make the difference between average waves and great waves. If the wind is blowing onshore (towards the beach) it will flatten waves and cause chop. If the wind is blowing cross shore, it will create shop and poor wave conditions.
If the wind is blowing offshore, however, it will prop up the face of the wave and create clean surf conditions.
WIND SPEED
Regardless of what direction the wind is blowing, high wind speeds will create more difficult surfing conditions. A gentle wind is an ideal scenario for surfing. If the wind is blowing onshore, but only at a speed of 3 or 4 mph, then the conditions will most likely still be clean.
Even if the wind is directly offshore, high wind speeds will make it difficult to drop into waves.
TIDE
While some breaks work at all tides, not all breaks are created equal. In the same vein, some breaks work well at high tide and others exclusively at low tide. The deciding factor has to do both with swell/ wave size and the ocean floor contour.
For example, certain reef breaks may only be safe to ride at high tide because the reef could be exposed or too shallow at low tide. Similarly, some sand bars may be too deep to effectively cause waves to break during high tide, but they may work well during low tide.
Fortunatly for us, there’s very little tidal change on the beaches of the North Coast, so you can surf in all tides
VIDEO EXPLAINING THE DIFFERENT ELEMENTS
WAVE TYPE
While the wave type of any given break does not fluctuate and is not technically part of your daily surf forecast, it is usually included in a small section to help you better comprehend how the wave breaks on any given day.
There are three main wave types: beach break, reef break, and point break. Each wave type can produce a left, a right, or an “A-frame” depending on the set up of the break.
BEACH BREAK
A beach break is the ideal learning setting for any beginner surfer. Beach breaks have sand floors, meaning that they have surfers who hit the bottom have a low risk of injury. Waves break over sand bars (rather than reefs), which can shift significantly during a day creating several peaks.
Additionally, wave energy pounds into the sand and has nowhere to go but up and out, which creates an arduous paddle out during a large swell.
REEF BREAK
A reef break is any wave that breaks over some type of submerged rock formation. There are a variety of types of reef breaks, some of which are beginner/ intermediate friendly and some of which that are advanced only.
SUBMERGED REEF
A submerged reef break is the only variety that could be considered beginner to intermediate friendly. While every beginner surfer should start out on a beach break, once they have mastered the pop-up and are able to successfully ride down the line at will, riding a submerged reef break is not out of the question.
A submerged reef break is not a live coral reef, the ocean floor is made up of rock that has been covered by sand. While you don’t’ necessarily want to get slammed into a submerged reef, you won’t hurt yourself by walking on it.
CORAL REEF
Coral Reefs are, are full of, living organisms. Coral is sharp, simply stepping on coral can cause injury. Additionally, many coral reefs can be full of sea urchins that’ll ruin any surfer’s day. Coral reefs, regardless of the depth of water at the break, should only be surfed by intermediate to advanced surfers.
ROCK REEF
Similarly, rock reefs can put a serious damper on your day if you come into contact with them during a wipeout. While the rocks may not be sharp (they often are though), they may still be riddled with sea urchins just waiting to impale you. Depending on the depth of water over the reef, rock reefs should only be ridden by intermediate to advanced surfers.
POINT BREAK
Point breaks cater to surf progression. Point breaks are generally slow breaking, mellow rides that often offer up ideal sections for carving and turning. A point break is caused by an obtrusive land or underwater mass—often rock— that runs perpendicular to the wave/shoreline.
The protruding mass will cause the peak of the break to present itself at roughly the same place every single wave, which can crowd the lineup, but offers workable sections for intermediate surfers looking to improve.
Armed with the newfound knowledge of an amateur meteorologist, you are ready to take to the sea, plan your next surf trip to Swell Surf Camp, or drive down to the coast to catch some waves!
WAVE FORECASTS FOR THE DOMINICAN REPUBLIC
The surf forecasts we use the most in Cabarete are and Windguru (opens new window) which is very reliable for wave and wind forecasts for surfers and kitesurfers.
In need of good waves?
At Swell we provide Learn how to surf holidays for people that have never surfed before as welll as a great social place to stay for advanced and expert surfers looking for a cool, comfortable & social place to stay. We offer full packages which include:
Like it or not, sometimes, there are just no waves to be surfed. On the North Coast of the Dominican republic this is very rare, but 5 to 10 days per year the waves get smaller than knee high. This is something which is naturally disappointing if you have travelled to a particular destination intent on catching some swell, though there are many other exciting and fun ocean activities which you can certainly try if the waves are flat. These will perhaps provide you with an altogether different experience and feel of the ocean than surfing. Nonetheless, they still have the potential to be amazingly fun and increase your overall appreciation of the ocean when the surf is not up.
SUP
Stand-up paddleboarding is something which many surf enthusiasts have likely already tried. If not, then anyone with some decent experience on the board will take to this ocean activity in no time at all. There is something very tranquil and peaceful about SUP. This activity allows you to glide, almost effortlessly across the ocean.
During this experience, you are bound to experience some moments of peaceful enlightenment. SUP is growing steadily in popularity with many beautiful global destinations keen to offer this for periods during which the waves are calm. It is also relatively easy for a novice surfer to pick up.
As mentioned, it is a great way to improve board confidence which you can then transition into your surfing experiences. Check out the center for surf research for some awesome information on all things sustainable, and some great information on the best paddleboards to suit your style. As with any activity, it takes some learning and practice which is best performed with the right equipment. Once you get the hang of paddleboarding though, it is perfect for those days when the waves are flat, or you just feel like a more relaxing cruise along the coast. Some have even been known to commute via paddleboard.
KAYAKING
Another water-based sport for the times when the ocean is calm, although this can be either relaxing or exhilarating depending on your preference. Naturally, you can have some great experiences kayaking the oceans when the waves are low. There are many different types of kayak suitable for one or two people which are usually highly durable and easy to transport to your destination.
Besides just paddling around, you could explore some nearby caves, or just admire the views and the stunning ocean from your location.
Kayaking is very easy to pick up for beginners in terms of a learning curve, and you can be out on the ocean in no time at all. The fantastic thing about kayaking is thanks to the safety and security of most kayaks, you can go out in groups and enjoy a really fun day in the ocean.
Why not bring some lunch and aim for a nearby sandbar or beach to explore for the day. All of this will be possible depending upon your location. This is one of the most enjoyable pursuits for many who want a break from surfing but still wish to enjoy the qualities of the ocean from above. Certain forms of kayaking can also provide the thrill which many surfers often seek, although these are most often found in rivers rather than with ocean kayaking. Either way, it presents a great opportunity to view the ocean from the surface in all of its splendour.
SNORKELING
Moving below the surface, snorkelling can be an easily accessible, yet life-transforming experience under the correct conditions when the waves are not on your side for surfing. With just a few easy to acquire pieces of equipment, you can begin exploring what lies beneath that beautiful ocean which you often surf. For many, this can be a truly transformative experience. Seeing the beauty of life, flora, and fauna which is just below our feet can be a powerful moment.
Ultimately, snorkelling is a fun activity which you can also enjoy at your leisure with a partner or younger family members without any fear of injury or accident, and if you are lucky, you may get to capture some picturesque moments along the way. Certain areas are of course more suitable than others. These include areas such as Cebu, the Philippines which is famous for its amazing snorkelling experiences where swimmers can interact with whale sharks up close.
There are many of these types of experiences offered, usually in the deeper waters, but if you are just curious to check out what is beneath the usual surf, this is the ideal activity of choice for you on the next calm ocean day. Swell offers snorkeling trips to Sosua for our clients, see more information on the adventure day trips we offer
SCUBA DIVING
If you have tried and enjoyed snorkelling but wish to go quite a lot deeper and become fully immersed, then scuba may be the ideal direction for you. Naturally, this is not something which you can decide to do on a whim. It will take a lot of learning and dedication to become an accomplished diver. Even getting started as a beginner can be a daunting task. It is also though, one of the most rewarding experiences which any ocean lover can undertake.
Exploring deep below the surface, you will likely encounter many breathtaking scenes which you simply could not comprehend from above. This gives most of us an entirely new perspective on ocean life, and can greatly enhance our future surfing experiences. From having the ability to view shipwrecks to the most diverse ranges of aquatic life, this is certainly one of the most impressive and energizing experiences you can engage in, and in fact, it goes much further beyond just something to do when the surf is not good. Both activities though can certainly be learned and enjoyed at the same time.
You can also check an interesting article on underwater scooters for scuba diving on Cape Boating
SAILING
If all of the above sound like a lot of hard work to you, you could always decide to take to the ocean in a different form of transport entirely. One activity loss is another’s gain. Sailing is one activity which certainly relies on calm seas, quite the opposite to what would be ideal for surfing. Of course, this is another activity which requires some preparation, you need to have the use of a sailing boat for a start. Once this is the case, however, there is often no better or more exciting way to traverse the open sea, depending on the type of sailboat you are using.
Sailing can be smooth and relaxing or also hard work. It really depends on who is doing the sailing, however, as a passenger it can provide a fantastic sense of freedom and adventure. There are many stories of solo or tea sailboats travelling the world. This open approach to the ocean provides a sense of escape which is unattainable through an activity such as surfing. With someone else in control, it can also be a relaxing way to experience your surroundings from a more distant and comfortable viewpoint.
CONCLUSION
Of course, under ideal circumstances, the waves will be fantastic and perfect for surfing. As experienced surfers, however, we know that this is not always the case and that unexpected changes in conditions can drastically alter your plans for the day. As we can see from the above ocean activities, though, there is no shortage of other options to pursue when the sea conditions are calm. Whichever other activity you choose to spend your time on will open up your eyes to viewing the ocean in a new light, and will likely also provide the entertainment or relaxation you require.
You have made the smart choice on going on a holiday to the Caribbean country of the Dominican Republic, and now you are looking for information on how to get to the Dominican republic, and once on the island on how to get around.
The DR is a large island so below we have made compiled all the info you need for a succesfull trip to & around the DR.
The first part is about getting to the Dominican republic, and the second part is about getting around the island
GETTING TO THE DOMINICAN REPUBLIC
In the Dominican Republic, there are several marinas for ships and boats, domestic airstrips for private planes and charter, and eight international airports are operational. Regardless of your means of transportation and destination in DR, one major factor to consider is choosing the right gateway. DR is a large island with road distances that could take you close to 24 hours to reach your destination. For instance, you will have to spend about seven hours to transport overland from Punta Cana to Puerto Plata airports. Hence, it becomes pertinent to choose the right arrival and departure gateway that is nearest to your destination as it will reduce cost and stress.
INTERNATIONAL AIRPORTS OF THE DOMINICAN REPUBLIC:
SANTO DOMINGO
• Las Americas International Airport (SDQ): this airport is about 30 minutes from the capital of Santo Domingo. Also, it is the main point of entrance for international air arrivals into the city. SDQ which is also known as the Jose Francisco Pena Gomez International Airport is one of the most accessible places to reach the beach towns of Boca Chica and Juan Dolio as it is just six miles away.
• La Isabela International Airport: which is also called Dr. Joaquin Balaguer International Airport (JBQ) is situated at the north end of Santo Domingo where flights are leaving and arriving from Haiti, Cuba and the chosen nearby Caribbean islands are handled.
PUNTA CANA
From Punta Cana International Airport (PUJ) to Punta Cana and Cap Cana areas, it will take you 15-minute drive, but you will need a 30-minute drive to reach Bavaro, El Cortecito, and Arena Gorda from the same airport. Also, about 45-minute is needed to move from the airport to areas such as Macao and Uvero Alto. PUJ is the busiest airport in DR because it handles flight from more than 28 different countries and 96 cities around the globe. Also, it is the second busiest airport in the whole of the Caribbean region with an estimated 3.5 million international passengers entering DR through PUJ per year.
PUERTO PLATA
The Gregorio Luperon International Airport – simply known as POP – is situated at a 20-minute distance to the north coast city of Puerto Plata as well as some nearby tourist centers such as Cabarete, Playa Dorada, Cofresi, and Sosua. Also, you will be able to reach Playa Grande and Rio San Juan within an hour by road from POP.
LA ROMANA
The southeastern coast located La Romana International Airport (LRM) is also referred to as the Casa De Campo International Airport. The airport is about 10 minutes and 20 minutes away from Casa de Campo Resort & Villas and Bayahibe respectively by car. Also, you will be able to reach Santo Domingo by car from LRM within two hours while it will take less than one hour to reach Punta Cana.
SAMANA
You can also call the El Catey International Airport as Juan Bosch International airport or simply as AZS. It is about 30 minutes from the city of Santa Barbara de Samana as well as Las Terrenas. Nevertheless, you will have to be patient for an hour to reach Las Galeras from the airport by car.
SANTIAGO
From the Cibao International Airport (STI) to the bustling Santiago, it will take just 15 minutes. Santiago is the second biggest city in the Dominican Republic and is located within the mountainous region of the nation. STI is also close to other cities and towns such as Constanza, La Vega, and Jarabacoa. You can use STI as your gateway if you will be residing in Puerto Plata; however, it is advisable to add some extra transportation time to the time of your return flight.
The Dominican Republic has an excellent means of movement to other countries around the world. And also, within the country, you will see a series of flight options that travel to North America and Europe. Airports such as the Santo Domingo, Punta Cana, and Puerto Plata are the primary entry point into the country by air. However, international airports at Santiago and Samana are also used continuously and reliable.
Entering the Dominican Republic is relatively cheaper if you come through a charter flight as a result of the massive all-inclusive tourism industry which is located along the Dominican shores. Within this area, a package deal which includes airfare, food abound, hotel at a low price are made available to those who will like to tour around. Even if you choose not to go all-inclusive, the air charters which moves package tourists to their inclusive destinations do provide additional seats to independent travelers regularly at a low price. While those entering DR from South Africa may get to see lesser bargains, they will need some strength to enter the country through the major airlines; although, they won’t be safe from a transfer in some moments during their trip.
Flights entering Dominican Republic from USA and Canada
Some flights are available from the major cities of Canada and USA that conveys passenger to the Dominican Republic. Although some west-coast movements need an overnight stay in New York or Miami, you will get some of the cheapest and most frequently passed gateway from the cities of New York, Montreal, Toronto, and Miami. For instance, JetBlue – the budget airline – offers low-cost travel from North America to airports in Santiago, Puerto Plata, and Santo Domingo. Since all the flights pass through New York City, it is necessary to demand a transfer if you are coming from other countries on the continent.
You can get a handful of companies that offer valuable package tours to Dominican resorts for seven to fourteen days. Generally, these packages are made obtainable to the top commercialized destinations like Cabarete, Puerto Plata and Sosua in the north end of the country and Boca Chica, Punta Cana/Bavaro and Juan Dolio in the south side.
Most package tour operators in the USA mostly work from a specific city and may not be able to connect flights from other areas. Basically, one operator will be able to book your flight with American Airlines and take you to the DR from any major city in the USA – take note that their services are always a bit pricier. If you are leaving from Canada, Dominican packages are served by series of travel “wholesalers” and charter airlines who do avoid dealing with individual citizen directly; instead, you will have to engage a local travel agent if you want to order for one of their packages.
Flights entering Dominican Republic from Europe
You can get a direct flight from London to Punta Cana through British Airways, but its only twice per week; currently, they operate on Thursdays and Sundays to and fro at the cost of £300 to £400 all year-round. Also, it is possible to leverage BA to enter Puerto Plata and Santa Domingo; although you will have a stopover in Miami with a connecting flight via their partnered American Airlines.
Another option you can use is that there are some charter flights which travel directly from London Gatwick and Birmingham to Punta Cana or Puerto Plata. Typically, they operate with all-inclusive hotel accommodation, but you can book for a free seat through the website of one of the many charter flight wholesalers. Every scheduled travel to the Dominican Republic moves every day from Gatwick and Heathrow – if you are going to Punta Cana, you will have to move through Paris while to arrive in Puerto Plata, you will need a stop off in New York.
There are also several charter flights per week to the Dominican Republic from: Germany, Switserland, France & Scandinavia
Flights entering the Dominican Republic from Australia, South Africa, and New Zealand
Traveling directly to the Caribbean from Australia or New Zealand is almost unrealistic. The reason is that there is no direct flight from these countries to the Dominican Republic as you will have to fly down to the US or Europe first. Whichever route you decide to take, it is a day-long journey; however, the most comfortable way is through Australia in which there won’t be any stop off from Sydney to New York City through Qantas, United, or American, which is preceded by a follow-up movement to the Dominican Republic through any of the North American Airlines highlighted below. If you are coming from New Zealand, you can follow a direct flight from Auckland to New York, but there will be a stop at Los Angeles, from where you will proceed to DR.
Tourists from South Africa can enter Santo Domingo by following Iberia airlines, although there will be a stopover at Madrid and/or London. Also, they can land at Puerto Plata and Punta Cana through British Airways with stops at London and/or Miami during the journey.
GETTING AROUND THE DOMINICAN REPUBLIC
PUBLIC TRANSPORTATION
The public transportation system in the Dominican Republic is modernized and comprehensive. Citizens of the countries are regularly on the road for one reason or the other. You can get Uber in three big cities such as Santiago, Puerto Plata, and Santa Domingo. On the contrary, Taxis are everywhere while you can also get different kind and sizes of a bus moving to different towns or cities you might want to visit. Public transportation is one of the most affordable means of movement in DR as well as an excellent way of sightseeing. Consequently, it promises a memorable experience in the country.
SANTO DOMINGO SUBWAY
The Santo Domingo metro works on two lines which are mostly utilized by residents moving to their place of work. However, there are several stops which makes sightseeing quite convenient. For instance, line 1 pass through north to the south via Maximo Gomez Avenue, right from the Villa Mella region to the Centra De Los Heroes which is the area where the Congress, Department of Migration, the Supreme Court of Justice and several other government ministries are situated. If you alight at the Casandra Damiron stop on line 1, you will see the Plaza de la Cultura directly – this place is where important Museums and the National Theater are located. From the east to the west, the Line 2 moves from the John F. Kennedy Avenue through the Agora Mall located at the Pedro Mir stop and to the Felix Sanchez Olympic Stadium. For a roundtrip subway, the transport fare is RD$15 for a rechargeable metro card, RD$40 for roundtrip and RD$80 to have a day pass. The subway opens by 6 am and closes by 10:30 pm.
TAXIS
Taxis are ubiquitous and can be board in almost every city and town. You will see them mostly at major bus stations, tourist areas or hotel vicinities. If you will be residing in major cities such as Puerto Plata, Santiago or Santa Domingo, the most advisable option is to order for a 24-hour taxi service from one of the taxi companies – you can ask a representative from your hotel, or ask any native for the most reliable option and also to help contact the brand. For example, Apollo Taxi and Aero Taxi are famous in Santo Domingo. It is advisable to confirm the car color and the estimated waiting time while speaking with the representative of the taxi company. Also, endeavor to confirm the cost of your destination and rates which are stipulated by taxi association for movement within the city.
UBER & CABIFY
In the year 2015, the popular ride service app UBER was launched in the Dominican Republic, and currently, it is highly active in three big cities, namely Santiago, Puerto Plata, and Santo Domingo. Also, Cabify works in Domingo. The two apps are safe to use within any region in DR. The reason why most tourists choose to use the two apps is that there is no need to discuss with the driver on the phone – which is a solution to the language barrier. Also, they operate with a better functional car with air conditioning system and seatbelts – that aside, the fare is low during periods of no heavy traffic.
LONG DISTANCE LOCAL TRAVEL
INTERURBAN COACH BUS SERVICE
Comfortable and large coach bus services which links several regions to another is one of the significant advantages of DR. Three reliable brands provide a daily trip to major cities with modern, air-conditioned buses which has Wi-Fi service. One of the three brands is the Metro Tours buses that travel through Santo Domingo, Puerto Plat, Sosua, La Romana, and Santiago as well as a daily departure to Port-au-Prince, Haiti. The second brand is the Caribe Tours buses that also leaves for Santo Domingo, Santiago, Sosua, and Puerto Plata. Also, Caribe buses do visit Barahona, Cabrena, Samana, La Vega, Montecristi and several towns in the Dominican Republic including Haiti daily. The third bus company is known as Expreso Bavaro which is the only bus service which links Santo Domingo to Bavaro daily, and also, it is an excellent option for Punta Cana travelers.
The cost of Bus service does range between RD$200 to RD$500 for a one-way trip. Ensure that you arrive one hour before the departure time of the buses to take a seat, and ensure that you move along with a sold jacket or scarf because the buses mostly set the air-conditioning to the lowest level.
LOW-COST MINIVAN BUS SERVICE OR GUAGUAS
Private individuals own the Popularly known minivan buses called Guaguas. They are small compared to the large buses and travel scheduled routes within a city, long-distance to small and big areas daily. The guaguas which cover the long-distance journey are quite comfortable like the large coach buses with 20-25 passengers. Each passenger will have a seat and Wi-Fi connection to use. If you don’t want to stop during your trip with guaguas, it is best advised to check those labeled with “Expreso.”
IN-CITY TRANSPORTATION
MINIVAN BUSES
The guaguas which travels to the innermost part of the city are usually white vans which stop to pick and drop passengers while moving along a scheduled route. These minivans are the slowest form of movements on the ground. In most cases, passengers are packed together. However, it is the cheapest form of transportation within the city or town. It is advisable to have your change before entering the buses as the drivers do not have changes in most cases, and eventually, you might have no choice than to pay more. Every guagua has a driver and a conductor who call passengers while the minivan is moving, collect fares from the passengers and inform the driver about the next stop. It is encouraged to tell the conductor where you will be alighting immediately you enter the bus, and be ready to pay once you enter or as demanded by the conductor.
Word of warning: The Small guaguas can get very full ( How many passengers can fit into 1 Guagua? Siempre uno mas! Always 1 more)
MOTORBIKE TAXIS OR MOTOCONCHOS
Most of the locals in the big cities such as Santo Domingo, Puerto Plata, and Jarabacoa uses the famous Motorbike taxis as they are the cheapest and quickest means of getting past the traffic. However, it is also the most dangerous means of traveling most especially in big cities where there is heavy traffic. Most of the drivers of motorbike taxis don’t have a helmet for passengers, even though they are tasked to provide one by the government. You should know that taking a slow bike taxi across the mountain towns of Constanza and Jarabacoa is an excellent method of exploring fantastic scenes. You will likely see a motorbike taxis driver wearing a neon-colored vest – but not all of the drivers do wear it. You can request for a motoconcho hub in your area or secure a referral from your hotel. Depending on your destination distance, the cost of fare for motorbike taxis does range from RD$25 to RD$75 within the city.
SHARED TAXIS OR CONCHOS
The shared taxis are also referred to as carrito–conchos, carritos or simply as conchos. Conchos are four-doors sedans which are similar to the in-city guaguas since they also move through particular routes and stop at any spot along the way based on passenger’s request. They can be boarded in the big cities, towns as well as villages. Compared to the guaguas, they are more comfortable; nevertheless, the passengers are usually packed together at the back and front seat. The cost of conchos’ fare is cheaper than the fare of private taxi – which costs RD$150 – as it falls between RD$25 to RD$50 based on your destination.
HIGHWAYS OF THE DOMINICAN REPUBLIC
There are several modern and functional highways in the Dominican Republic which connects the major cities, the coastlines and many famous places of tourism together. The highways are a reflection of the memorable scenes within the nation, most especially the beautiful views along the highways that run from Santo Domingo to the Samana Peninsula, Jarabacoa as well as the coast of Puerto Plata. You should get accustomed to these highways particularly if you aim to hire a car and tour around several regions within the country. You can encounter tolls based on your destination and location; endeavor to ask a representative at your guesthouse before proceeding with your expedition. For example, the highway that covers Santo Domingo to Boca Chica holds one tollbooth; in contrast, there are four tollbooths between Santo Domingo and Bavaro. Also, you should know that the toll fees do vary between RD$60 to RD$1OO per booth. Take along a small change in Dominican pesos while moving out. Although dollars are acceptable, any change required will be given in local currency.
Route One: Autopista Duarte covers from Santo Domingo to Santiago: It has four lanes connecting the north and south side of the country. It will take about two hours to drive from the capital city to Santiago which leads to La Vega and Jarabacoa.
Route Three: Autopista Las Americas: it connects the Las Americas International Airport in Santo Domingo to the western end of the city as well as the beach town of Boca Chica towards the eastern end. Eventually, it links up with Autopista Coral along La Romana.
Route Three: Autopista Oscar de la Renta: it is also referred to as the Autopista del Coral. It connects Santo Domingo to the Punta Cana resort area while bypassing Higuey within three hours and also enters La Romana in a one-hour drive.
Route Five: Carretera de Puerto Plata: this highway is a dual-lane which runs along the North coast. This highway offers one of the most eccentric and beautiful drives within the country as it passes fishing villages, beaches, far verdant hills, and campo life.
Route Seven: Santo Domingo to Samana Highway: as the name suggests, this highway connects Santo Domingo to the northeastern Samana Peninsula. You will be fascinated with appealing scenes of dense coconut tree-laden hills from the coconut oil plantation looking over a bright blue sea. Another option you can use is to pass through Route 133 or Turístico del Atlántico to reach Las Terrenas; however, it will cost you extra US$11 as a toll fee which is nothing compared to the exciting, winding coastal scene and a vista images over the Bay of Coson through your expedition.
The Dominican Republic has it all!
Enjoy your holiday on our beautiful Caribbean island, if you are still looking for a cool place to stay and are looking for an active watersport holiday, see what Swell Surf camp has to offer for you
Questions or comments about this surf technique article? Let us know, send us a message.
Let’s talk about surf stance! The term Goofy foot came into existence after Goofy, a character in Walt Disney movie, surfed by putting his right foot forward, unlike the majority of surfers that put their left foot forward when surfing. This cartoon character was a left-hander and seems to prefer goofy surf stance, so now you understand.
Avoid assuming that being a left-hander automatically makes you a goofy footer or being a right-hander automatically makes you a natural footer. This is a generalization because there is no absolute rule about it.
Are you a goofy or natural footer?
In case you are enthusiastic about skateboarding or snowboarding, the same thing is applicable to surfing. If you have no experience with skateboarding or snowboarding then assume that you are moving swiftly on the ice and about to slide, which of your feet would be put forward as you slide?
When sliding, you will experience a certain comfort zone in a particular position over another. In one position, you will experience stability and strength while you will feel awkward and uncertain in the other.
For better utilization of your water time, understand your stance in advance. There is no need for you to waste good waves on understanding something you are capable of learning from the comfort of your home.
However, the position of your front foot and back foot on the surfboard is not the only thing to know about surfing stance.
Your turns, acceleration, balance as well as general maneuvering display when you are on the wave will be greatly improved if you can adopt an optimum stance while you are on the surfboard.
A low surf stance will assist you in maintaining your balance if you are new to surfing.
However, you should avoid going too low.
As they are catching their first waves, inexperienced surfers are advised to ensure that their feet are kept shoulder-width apart. Simultaneously, they should bend their knees for impact absorption and keep their hands close to the rails of the boards or, at the minimum, at the waist level.
It is essential for people that are new to surfing to understand the appropriate surfing stance before getting into the waves.
Through optimization of weight distribution and adjustment of the body to the regular morph of the wave, new territories in wave riding will be seamlessly unlocked by an appropriate surf stance.
The right placement of your feet on the surfboard is the first step to a good body position.
In case your position is too distanced on the tail, you will end up miring the surfboard, slacking off and ultimately blotting out.
As a basic guideline, the surfer should place his feet over the stringer and focus on the board’s width.
Steer Clear of the Poo Stance One of the majorities of mistakes that beginners, intermediate and even some experienced surfers make is the poo stance.
Just as the name indicates, when riders use the poo stance, their posture looks like that of someone sitting on the toilet seat with the knees facing different positions.
What you are doing is surfing, not using the toilet seat. Steer clear of this by any means necessary. Not only does this stance look bad, but it will also prevent the movement of your hips as you try to limit your movement on the face of the wave.
The Open Surf Stance
During the process of surfing, it is important for you to be able to handle the movement of the surfboard forward, backward, above the heels and above the toes.
Nevertheless, rather than pointing their foot sideways, lots of first-timers position their front foot to look forward. This position is known as the open stance.
An open stance allows you move forward and backward; however, it makes it impossible for you to control your movement from side to side because your front foot is looking in the direction of the nose of the surfboard.
Taking Off
For any surfer, the specific wave that he wants to ride should be used for determining his stance.
When paddling into a wave that is small, slow and mushy, the feet of the surfer may be moved forward in the direction of the nose of the board and maintained in a comparatively low stance to ensure that surfing continues.
However, in case you are riding on a medium-sized wave that is fast and hollow, you are compelled to move your feet back closer to the tail as you are taking off to ensure that obliteration is prevented.
In case you are surfing in a surf break that is affected by the wind, it may be important for you to reduce the center of gravity to take in the impacts that the rough waves produced.
Big wave surfing also requires the same rule. To maintain balance, reduce the risk of blotting out, and take in unforeseen bumps, extreme surfers have the tendency to crouch.
Low Surf Stance: an exceptional method to maintain balance.
Riding Down the Line
As soon as you start surfing, the trick lies in your ability to transfer your weight from the tail until it reaches the center. The aim is to optimize the time you spend surfing and ultimately maneuver as much as possible.
However, the surfing stance is similarly, and at the same time, an important gas pedal and brake.
Whenever there is a need for you to speed down the line to beat a crumbling section, you should ensure that your weight is shifted backward.
That is, make sure your back knee is bent.
The Essence of the Arms and Hands
When it comes to maintaining the balance as well as using the ideal surfing stance, your arms are very essential.
After you have turned up and started riding on a wave, focus on your destination and free your arms.
It will be noted that your front arm will be near the left rail of the surfboard while your right arm will be kept far back, above the right tail and near the tail of the board.
How to position feet for your turns Unless there is pressure from the back foot heel and toe, the board will never make the right turn. Your back foot acts as the accelerator pedal. Although your front foot has no effect on the turning process, it offers you balance.
For you to make a proper turn, place your back foot above the top of the front fins or negligibly at the back (based on the length and type of surfboard). When a bottom turn is performed, you apply pressure to the back foot, with the main focus on the toe pressure; as a result, the rail in the tail is sunk, the fins are utilized, and the board is allowed to get to the rail and speed during the turn.
Foot placement in surfing
Even after application of back foot pressure, a few individuals still have difficulties with making a turn due to the fact that their foot has moved too forward. A back foot traction pad is excellent equipment because it allows you to know the specific position of your foot.
When using only wax, it will be difficult to tell where your foot is. With the aid of the traction pad, the tail of the surfboard is protected and the issues of denting from back foot pressure are relieved.
During the shift from a bottom turn to a cut-back, the back foot is pressurized once more, focusing on heel pressure, so that the rail is sunk, the fins are utilized and the board is allowed to bend during the turn.
If excess pressure is applied to the front foot during a cut-back or bottom turn, the center portion of the rail, simply forward of the front foot part, will slash into the water, ensuring that the rail is dug in and the board is slowed down. This is generally known as a rail catch.
A false impression is that a rail that is softer and rounder will not catch but an edge that is harder will catch. Without a doubt, this is a fallacy. It is only when the front foot is pressurized excessively during a turn that a rail will catch and bog.
Evidently, the turning process is largely dependent on flexibility and your body mechanics….however, to perform an excellent turn, the primary rule is back foot heel or fron foot toe pressure.
WANT TO LEARN TO SURF? OR IMPROVE YOUR SURFING
Interested in taking your surfing to the next level? Or if you have never surfed before, why not learn to surf in the warm Caribbean water on the North Coast of the Dominican Republic with Swell.
How do you get perfect wave selection?
Is perfection even possible? Maybe.
Waves are a funny thing, every wave is different, but they can look quite similar. Predicting how a wave will break may seem like a difficult task, but don’t worry. There are a few things you can do to get yourself prepared, and we’ve got four great tips right here to improve your wave selection.
1 – KNOW YOUR SURF BREAK
In order to get perfect wave selection, you need to know your surf break in and out… or at least know what makes your spot tick.
Several factors go in to creating a surfable wave at your break.
Distant storms
It usually starts by a storm far out at sea. Powerful winds wash over the ocean, creating friction in the surface of the water. Over time, this friction builds up more and more, to create powerful swell that can travel over entire oceans. Once the waves reach shallower water, your surf break for example, they jack up in size and fold over themselves.
This is what we call breaking waves, or “surfable waves”.
Know what your break needs
To have those perfect, glassy waves of your dreams, a number of factors must come together.
At your surf break, we’re talking:
Wind speed
Wind direction
Tide
Swell direction
Wave periods
If the wave period is too short, with howling onshore winds, in an extreme high tide, chances are that the waves won’t be very good.
With terrible conditions, chances are most of the surfed waves will be pretty terrible too.
Perfect offshore winds
For perfect conditions, usually you’re looking for:
Light winds
Offshore winds (blowing across the beach towards the ocean, the opposite is onshore) (Light onshore if you love to pop airs)
The best tide for your surf break (check online)
Swell direction pointing directly towards your surf break
Longer wave periods, over 10 seconds.
Surfing in great conditions will make it way easier to select your perfect wave… … but as you already know, perfect conditions aren’t always there.
That’s why we strongly recommend you to surf in lesser-than-perfect conditions as well. If you can develop perfect wave selection in subpar conditions, chances are you will absolutely excel on those good days. Just don’t go out in hurricanes or anything too crazy.
Research your break
Research your surf break online. See what weather conditions and type of swell makes your surf break go nuts. Read up on the best tide, wind direction, swell direction and type of swell. Then go surf as much as you can on those good days.
2. Watch the waves
Empty wave at our local surf spot in Cabarete
Watching the waves is a big one and goes hand in hand with our first tip. You first need to know about the perfect conditions for your surf break, to know when it’s go time. Then, you need to spend some time watching the waves when you get there.
It doesn’t have to be an hour long watching session… but in order to build up your perfect wave selection, you need to see how the ocean behaves before you paddle in. This could be done when doing your warm-up stretches, or when debating where to paddle out with your friend.
When watching the waves, there are a few things you should look for.
Find the peak
The Line up
“The peak” of a wave, means the position where the wave will start breaking first. Or, the ideal place to paddle and surf the wave.
You should always try to catch the wave right at the peak, to gain maximum speed and momentum. Shoulder hopping doesn’t do you any favors (on super crowded days we’ve all been there though…) and will limit your progress.
Look for where the line-up is and see where the other surfers are. Hopefully, most or at least a few surfers will know where the best place to sit is.
See how the waves break
In order to perfect your wave selection ability, you need to watch how the waves are breaking.
Are they mainly lefthanders? Righthanders? Is it a slower, mushier wave, or a fast, steaming, barreling freigh train? See if you can spot different sections in the wave. How many waves are in each set? Which wave is the biggest, and how far apart are the sets?
Having crystal clear knowledge about the waves you’re going to surf is critical for perfect wave selection.
If you don’t know which waves you want to surf, how could you see them in the line-up?
Other things (not necessarily related to wave selection) to look for include:
Entry/exit points
Rip currents
Hazards (rocks, dry reef, structures etc.)
It makes a lot of sense to know what you’re getting yourself in to before paddling out, which is why this is so important.
Watching the waves accomplishes three things:
-You develop a greater understanding of your break and the current surfing conditions
-You know which waves you want to catch…
-And which waves you don’t.
3. How to read waves
While in the water, having the ability to read waves is essential for perfect wave selection.
Imagine, you’re sitting on your board in the line-up, waiting for the next wave… you are first in line and stoked. The next set comes in. A huge, dark wall is
coming at you fast. Almost in an instant, you have to make the decision of whether to go, or to bail.
Spotting an incoming wave
How do you even know if it’s a good wave? Are you in a section that will just close out or are you in perfect position?
When to paddle
There is quite a simple technique you can use to read how a wave is going to act.
First off, use the horizon as a reference. Compare the angles of the incoming wave to the vertical line. The picture beside shows what an incoming wave could look like. You could be closer to the right or left side, or you could be right in the center. What does this mean? When should you paddle?
The parts of a wave
Looking at the wave coming at you, the left side is called a “right” because you go right when you surf it. The right side is called a “left” because you surf it to the left.
On the left and right side, you see the ends of the wave. This is called the shoulders of the wave. Shoulder hopping means catching the waves far out on the shoulders and should be avoided. The shoulders lack the power and speed that the peak provides.
Closeouts
Beware of closeouts (a wave “shutting down”). On an incoming wave, it’s quite easy to tell whether it’s a closeout or not. Any part of a wave that’s parallel to the horizon (vertical) will break first. Only the angled parts of a wave will break slower. In the example below, pretty much the whole middle part of the wave would break at once.
Is it a slow or fast breaking section?
The more vertical the wave is, the faster it will break. A steeper angle will break slower. In the example below, the right hander on this wave would break faster than the left hander. Why is it like this? Physics. And gravity-stuff… I don’t know.
Which direction do you surf?
If the wave looks exactly like in the picture, with both the option of going left and right, you have to make out which side you are closest too. If you are closer to the right, you catch and surf the right hander. Closer to the left? Then you surf the left hander.
What’s important is that you catch the wave in the steepest part of the wave, “the peak”. Then you ride towards the shoulder you are closest too. Or in other words, along the direction of the brea
4. Adapt your surfing
To get the most out of each wave, it’s important to adapt your surfing to the waves you surf.
You now know which conditions make your surf break great. You have watched the waves. With the surfboard around your arm, you sprint down to the beach, adrenaline rushing through your system.
Reading waves is now a piece of cake. You now know whether it’s a right or left hander and have some ideas on how to surf it. You also know where the peak is located and have decided on your focused location in the line-up.
Now what?
Adapt your surfing to the conditions you’re about to surf
If it’s a smaller day and a bit onshore, with fast sections, try working on your airs. Maybe work on your bottom turns or quick snaps. If it’s barreling but closing out, work on getting tucked in the barrel. Practice steep, fast drops. Work on getting pounded.
Make it clear in your mind before you jump in, what kind of surfing you are going to do with the waves of the day. This way you take full advantage.
You vs. Perfect wave selection
Perfect waves only exist on the most perfect of days. And the perfect days could almost always get better…
The key to selecting the perfect wave is to know which wave you want. And paddle for it.
In need of good waves?
At Swell we provide Learn how to surf holidays for people that have never surfed before as welll as a great social place to stay for advanced and expert surfers looking for a cool, comfortable & social place to stay. We offer full packages which include:
The Best Strength Exercises to Improve Your Surfing
Last week we focussed on cross training exercises to get your surf fitness up. Today we focus on the best strength exercises for surf fitness
Surfing is not like most sports: there’s no running clock, there’s no designated playing area, and there is certainly no prescribed training regime that works for all athletes. Many would argue that surfing is not a sport, but rather a lifestyle.
Hanging out at the beach and catching waves certainly doesn’t feel like a sport. Regardless of one’s views on where surfing fits into the sporting world, no one can deny that surfing is physically demanding. Simply paddling out on a decent-sized day requires a well-tested cardiovascular engine and a fit upper body. Catching a wave and popping up entails heightened agility and ample flexibility.
While the act of actually riding a wave and carving demands intense core strength and sturdy legs. Not all surfers are the type to hit the gym and pump serious iron, and that’s ok. Bulky muscle is not conducive to paddling, anyways. To achieve an optimal level of surf fitness, one needs the perfect blend of strength and muscle endurance. Dive in below, to check out Swell’s:
BEST SURF FITNESS EXERCISES
1. Pushups
This may seem obvious, but the simple push-up is a highly effective, yet often overlooked, tool for building upper body strength and endurance. The good thing about the push-up, as with any bodyweight exercise, you won’t build bulky, excess mass.
Instead, you will build functional upper body strength that is proportionate to your body weight. Work to perform a high number of reps at a high intensity. Set a lofty goal, like 100, 200, or 300 push-ups, and see how long it takes you to get there. Like paddling, the pushup, or press up as it is often referred to across the pond, requires a blend of strength and muscle endurance.
2. Pull-ups
Like the pushup, the pull-up is another phenomenal bodyweight exercise that will build functional strength relative to one’s body weight, not bulky, unnecessary mass, so an ideal surf fitness exercise. Similarly to how we described the pushup, with the pullup we want to build our rep capacity.
Start with a reasonable number like 10, 20, 30, 40, or 50 and attempt to execute that many reps in as few sets as possible. As you get stronger, set your rep goals higher. Unlike the pushup, the pull-up does, somewhat, mimic paddle movement and work the large muscles in the back (the lats) that are activated during paddling.
3. Inverted Rows
Often used as a scaled-down pull-up substitute, inverted rows are a great way to strengthen your lats, the small muscles in your upper back, and your rear deltoids (all paddle muscles). As stated previously, if you cannot do a pull-up, inverted rows are a great place to start. To perform lay horizontally below a suspension trainer or secured barbell. The higher off the ground the suspension trainer/barbell, the easier the exercise will be.
With your heels planted on the ground, grip the bar slightly wider than shoulder-width apart, or hold your suspension trainer in a neutral position slightly wider than shoulder width. Pull your chest towards the bar/ suspension trainer. As you pull, keep your core tight and hips up, in line with the rest of your body. As your chest moves higher, pinch your shoulder blades together to activate the smaller muscles in your back. Perform three sets of ten.
4. Handstand Push Up
Handstand push-ups might sound intimidating, but they are not as difficult as they may look and they have a myriad of benefits that will directly improve your surfing. Handstand pushups target your deltoids, which are used heavily when we paddle. What makes Handstand pushups superior to any old overhead press, for surf training specifically, is that like the aforementioned push-up and pull up, handstand pushups build lean muscle and functional strength relative to one’s body weight.
To perform, place a pad about 12 inches from the wall.
Place your hands slightly wider than shoulder width on the sides of the pad and kick your feet up so that you are in a full handstand position with your heels supported by the wall. Lower your head slowly down until it is resting on the pad and then push up to the starting position. Perform 3 sets of 5-10 reps.
Here is a good article on how to get started with handstand push ups (opens a new window)
5. Pike Push Up
For those not quite ready to kick up onto a wall and crank out handstand pushups, the pike push-up is the ideal substitute.
Like the handstand push-up, the pike push-up targets our shoulder muscles (deltoids), which are crucial in paddling. To perform a pike push-up, place your feet on a bench or box, with your hands on the ground, wider than shoulder width, shape your body like an inverted L. With your torso vertical, and your legs horizontal, lower your head down to the floor between your hands, and press back up.
6. Suspension Trainer Rear Delt Fly
The small muscles in our back our crucial for paddle endurance, but they are often overlooked in training. Fortunately, it doesn’t take much to keep your rhomboids and surrounding muscles fit. You don’t need to use a lot of weight, in fact, you only need to use a fraction of your body weight. Suspension trainer rear delt flies are a great way to train these muscles and you can do it virtually anywhere.
To perform, grab the suspension trainer handles and hold them together vertically, at arm’s length away from your chest. Walk forward a few steps and lean back so that your body is hanging at a slight incline, supported by the suspension trainer. Firmly gripping each handle, with your elbows slightly bent, pull the handles apart, while simultaneously pinching your shoulder blades together. Perform 3 sets of ten, focusing on control and maintaining a slow movement throughout the set.
7. Burpee Box Jumps
If you’re looking for an intense way to train explosiveness, like that required in a pop-up during a steep drop, look no further than the burpee box jump. Yes, it is as brutal as it sounds, but the combination of these two already explosive exercises create the perfect pop-up trainer. The burpee portion mimics the pop-up movement, training muscle memory, while the box jump adds lower-body strength training and explosiveness to the equation.
To perform, stand in front of a box slightly further than an arm’s length away. Drop to the ground, chest to the floor with your arms tucked at your side like you are about to perform a push-up. Then, explode off the floor back into a standing position and in one movement, execute the box jump.
8. Bosu Ball Stability Squats
This exercise is a tad more advanced than some of the others, but if executed properly and regularly, it will enhance your surfing ability. The Bosu Ball is a unique piece of fitness equipment that allows you to train strength and balance simultaneously.
If you can already properly execute a squat while balancing on a Bosu Ball, consider adding weight. If you’ve already added weight, try adding uneven loads, like one kettlebell overhead, and alternate sides. To perform, place the Bosu Ball ball side down and stand on the platform with your feet shoulder distance apart. Slowly and carefully, lower yourself down into a squat position. Make sure your knees never go past your heels. Add weight if necessary.
9. Rowing
The erg machine might be the best piece of equipment in the gym for total body surf training. Rowing recruits massive amounts of lower body strength, arm and back strength, muscle endurance, and heavy aerobic activity. Whether you’re training to paddle hard, toss buckets on turns, or to last hours in the lineup rowing is the exercise for you. To start, try rowing 1000 meters for time.
The most important part of training and getting in shape, is finding something that works well for you and that will keep you motivated. If you can surf every day, do it. There is no better surf training than surfing itself. If you can’t surf every day, hit the gym, the pool, the yoga studio, or the trail.
Enhancing Flexibility with Yoga
Best Yoga Poses for Surfers
Yoga and surfing go together like peanut butter and jelly. Yoga helps you become more flexible and balanced, which is super important for surfing. Some great yoga poses for surfers include:
Downward Dog
Warrior II
Pigeon Pose
Cobra Pose
Child’s Pose
These poses help stretch and strengthen your muscles, making it easier to move on your board.
How Yoga Prevents Injuries
Doing yoga regularly can help you avoid getting hurt while surfing. Yoga improves your posture and makes your joints healthier. This means you’re less likely to pull a muscle or strain something. Plus, yoga helps you stay relaxed and focused, which is key when you’re out on the waves.
Incorporating Yoga into Your Routine
Adding yoga to your daily routine is easier than you think. Start with just 10 minutes a day. You can do it in the morning to wake up your body or in the evening to wind down. Try to mix it up with different poses to keep things interesting. And remember, the more you practice, the better you’ll get at surfing!
Improving Balance with Bosu Ball Exercises
Top Bosu Ball Moves
The Bosu Ball is a fantastic tool for improving your balance and strength at the same time. Here are some top moves to try:
Bosu Ball Squats: Stand on the flat side of the Bosu Ball and perform squats. This will challenge your stability and leg strength.
Single-Leg Balance: Stand on one leg on the Bosu Ball and try to hold your balance. Switch legs after a set time.
Push-Ups: Place your hands on the Bosu Ball and do push-ups. This adds an extra balance challenge to a classic exercise.
Benefits for Surfing
Using a Bosu Ball can greatly improve your surfing skills. Better balance means better control on your board. Plus, the strength you build will help you paddle stronger and pop up faster.
Safety Tips
When using a Bosu Ball, safety is key. Here are some tips to keep in mind:
Start slow: Begin with basic exercises and gradually move to more advanced ones.
Use a spotter: If you’re trying a new move, have someone nearby to help if needed.
Keep your core engaged: This helps maintain balance and prevents falls.
Check your form: Make sure you’re doing the exercises correctly to avoid injury.
Cardio Boost: Jump Rope Drills
Why Jump Rope is Great for Surfers
Jump rope is an awesome way to boost your cardio and get your heart pumping. It’s a full-body workout that helps improve your coordination, balance, and endurance. Plus, it’s super fun and can be done almost anywhere!
Fun Jump Rope Routines
Mixing up your jump rope routines can keep things exciting. Here are a few to try:
Basic Jump: Just your standard jump, but try to keep a steady rhythm.
High Knees: Bring your knees up to your chest with each jump.
Double Unders: Swing the rope under your feet twice for every jump.
Criss-Cross: Cross your arms in front of you while jumping.
Jump Rope Safety Tips
To avoid injuries, keep these tips in mind:
Warm-Up: Always start with a warm-up to get your muscles ready.
Proper Footwear: Wear supportive shoes to protect your feet and ankles.
Smooth Surface: Jump on a flat, non-slip surface to prevent falls.
Stay Hydrated: Drink plenty of water before, during, and after your workout.
Conclusion
Surfing is more than just a sport; it’s a way of life that demands a unique blend of strength, flexibility, and endurance. By incorporating these strength exercises into your routine, you’ll not only improve your surfing skills but also reduce the risk of injury. Remember, the key is consistency and having fun with your workouts. So, grab your board, hit the gym, and get ready to ride those waves with more power and confidence. Happy surfing!
Frequently Asked Questions
Why are push-ups important for surfers?
Push-ups help build upper body strength, which is essential for paddling and popping up on your board.
How do planks improve my surfing skills?
Planks strengthen your core, which helps with balance and stability while surfing.
What benefits do squats offer to surfers?
Squats build leg strength, which is crucial for maintaining balance and control on your surfboard.
Why should surfers include rows in their workouts?
Rows strengthen your back muscles, which are important for paddling and overall posture.
Are burpees good for surfing endurance?
Yes, burpees are great for building both cardio and strength, helping you last longer in the water.
How can lunges help my surfing performance?
Lunges improve lower body strength and stability, which are key for powerful and controlled movements on your board.
What yoga poses are best for surfers?
Poses like Downward Dog, Warrior, and Pigeon help improve flexibility and prevent injuries.
Why is balance training important for surfers?
Balance exercises, like those on a Bosu ball, help you stay steady on your board and react quickly to waves.
This article: Surf fitness exercises is part of our Swell instructional how to surf blog posts. Other popular episodes are:
Have a look and see what a surf holiday with Swell is all about. We offer learn how to surf holidays for adults looking for an active & social water sport holiday. But we also offer a stylish and comfortable place to stay for people who already know how to surf.


 The strength of core muscles is responsible to stabilize your torso to help you in balancing, paddling, and rotation through turns.
 Stronger legs help you in maintaining balance and staying on board for a long time. Whether you are a beginner or an expert, single-leg squats will help you in developing the core and leg strength to paddle at your best and keep enjoying for a long time.
 Before you start surfing, you need a quick warm-up to give relaxation to your hips and shoulders and set them ready for paddling.
 Swell has set whole new standards in accommodation and guest experience of surf camps.


 This area of the island’s capital, Santo Domingo, is where Christopher Columbus first arrived in the Dominican Republic.


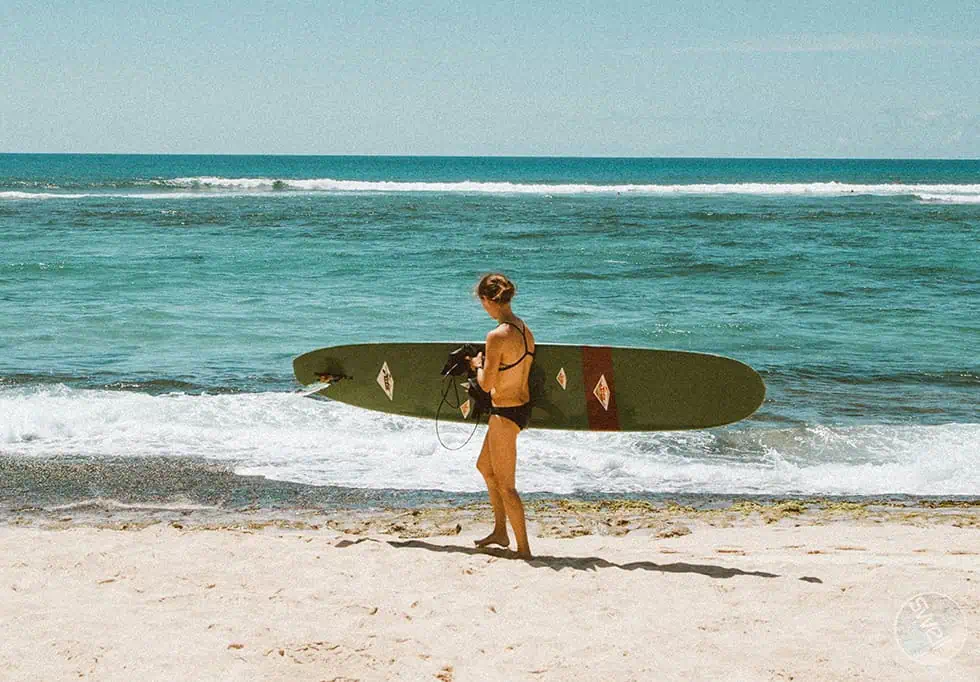


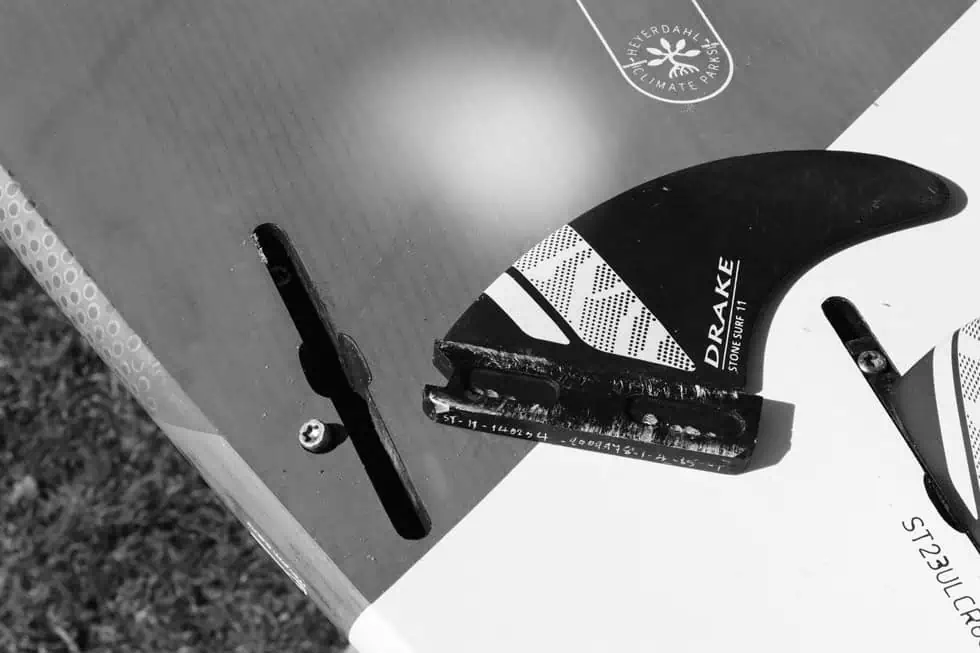
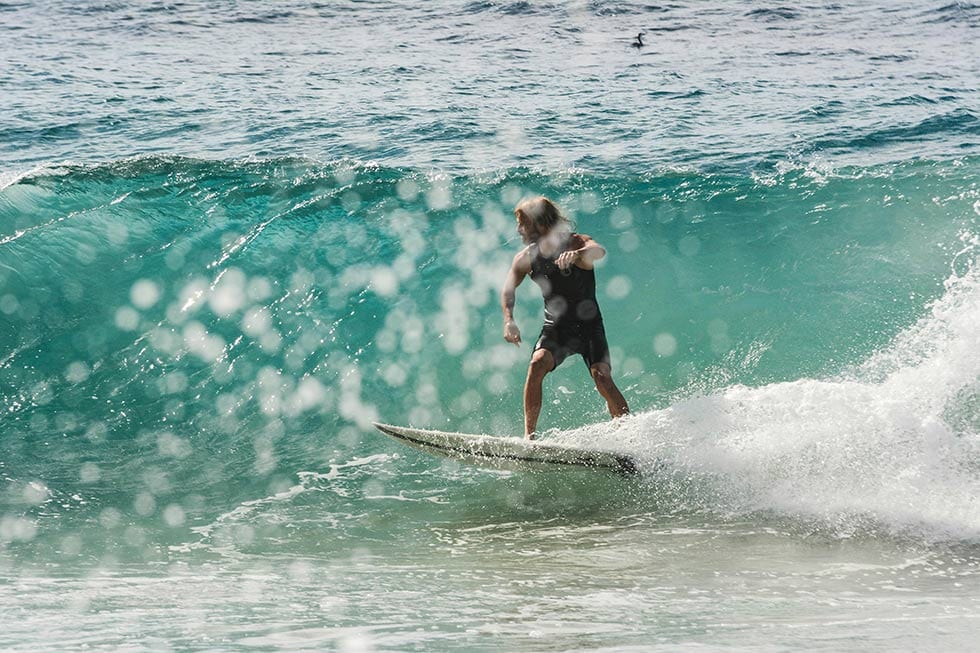


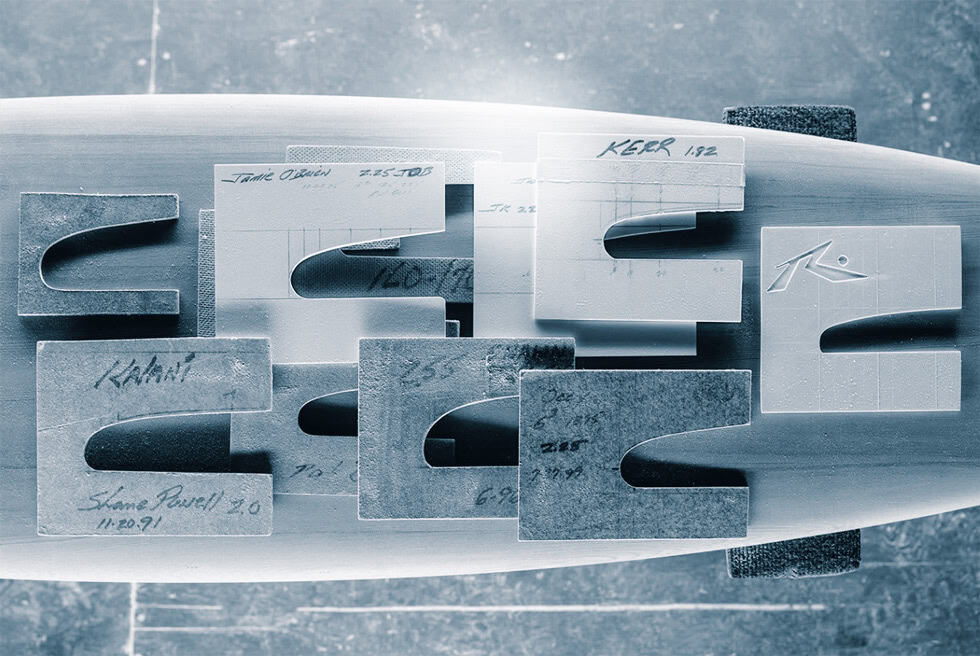
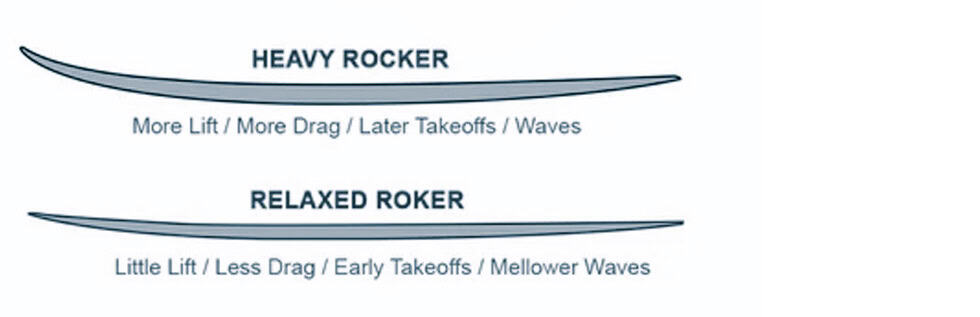
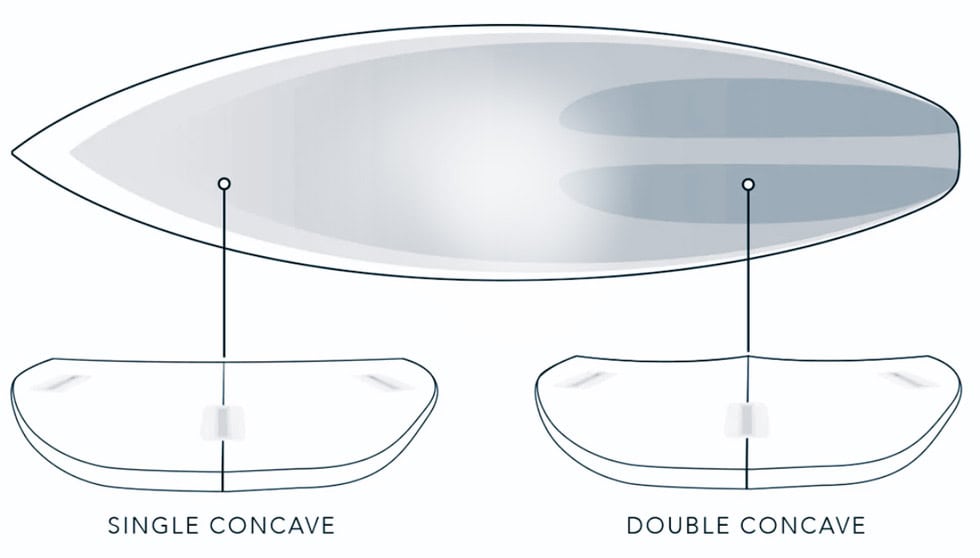

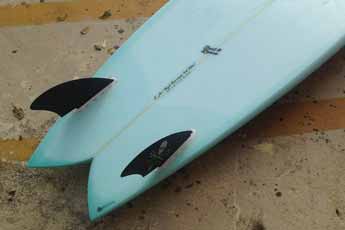


 One of the majorities of mistakes that beginners, intermediate and even some experienced surfers make is the poo stance.
 Big wave surfing also requires the same rule. To maintain balance, reduce the risk of blotting out, and take in unforeseen bumps, extreme surfers have the tendency to crouch.
 Unless there is pressure from the back foot heel and toe, the board will never make the right turn. Your back foot acts as the accelerator pedal. Although your front foot has no effect on the turning process, it offers you balance.
 Even after application of back foot pressure, a few individuals still have difficulties with making a turn due to the fact that their foot has moved too forward. A back foot traction pad is excellent equipment because it allows you to know the specific position of your foot.


 Looking at the wave coming at you, the left side is called a “right” because you go right when you surf it. The right side is called a “left” because you surf it to the left.
 This may seem obvious, but the simple push-up is a highly effective, yet often overlooked, tool for building upper body strength and endurance. The good thing about the push-up, as with any bodyweight exercise, you won’t build bulky, excess mass.
 Like the pushup, the pull-up is another phenomenal bodyweight exercise that will build functional strength relative to one’s body weight, not bulky, unnecessary mass, so an ideal surf fitness exercise. Similarly to how we described the pushup, with the pullup we want to build our rep capacity.
 Often used as a scaled-down pull-up substitute, inverted rows are a great way to strengthen your lats, the small muscles in your upper back, and your rear deltoids (all paddle muscles). As stated previously, if you cannot do a pull-up, inverted rows are a great place to start. To perform lay horizontally below a suspension trainer or secured barbell. The higher off the ground the suspension trainer/barbell, the easier the exercise will be.
 Handstand push-ups might sound intimidating, but they are not as difficult as they may look and they have a myriad of benefits that will directly improve your surfing. Handstand pushups target your deltoids, which are used heavily when we paddle. What makes Handstand pushups superior to any old overhead press, for surf training specifically, is that like the aforementioned push-up and pull up, handstand pushups build lean muscle and functional strength relative to one’s body weight.
 For those not quite ready to kick up onto a wall and crank out handstand pushups, the pike push-up is the ideal substitute.
 The small muscles in our back our crucial for paddle endurance, but they are often overlooked in training. Fortunately, it doesn’t take much to keep your rhomboids and surrounding muscles fit. You don’t need to use a lot of weight, in fact, you only need to use a fraction of your body weight. Suspension trainer rear delt flies are a great way to train these muscles and you can do it virtually anywhere.
 If you’re looking for an intense way to train explosiveness, like that required in a
  This exercise is a tad more advanced than some of the others, but if executed properly and regularly, it will enhance your surfing ability. The Bosu Ball is a unique piece of fitness equipment that allows you to train strength and balance simultaneously.
 The erg machine might be the best piece of equipment in the gym for total body surf training. Rowing recruits massive amounts of lower body strength, arm and back strength, muscle endurance, and heavy aerobic activity. Whether you’re training to paddle hard, toss buckets on turns, or to last hours in the lineup rowing is the exercise for you. To start, try rowing 1000 meters for time.
